cPFence allows you to use your own SMTP server to send email notifications, giving you more control over email delivery. When enabling this feature, you will be prompted to provide your SMTP details. Follow the steps below to set up and manage SMTP for cPFence notifications.
The WebUI provides a convenient way to configure SMTP across all servers in a single click.
Method 1: Using the WebUI (Recommended)
To configure SMTP using the WebUI, follow these steps:
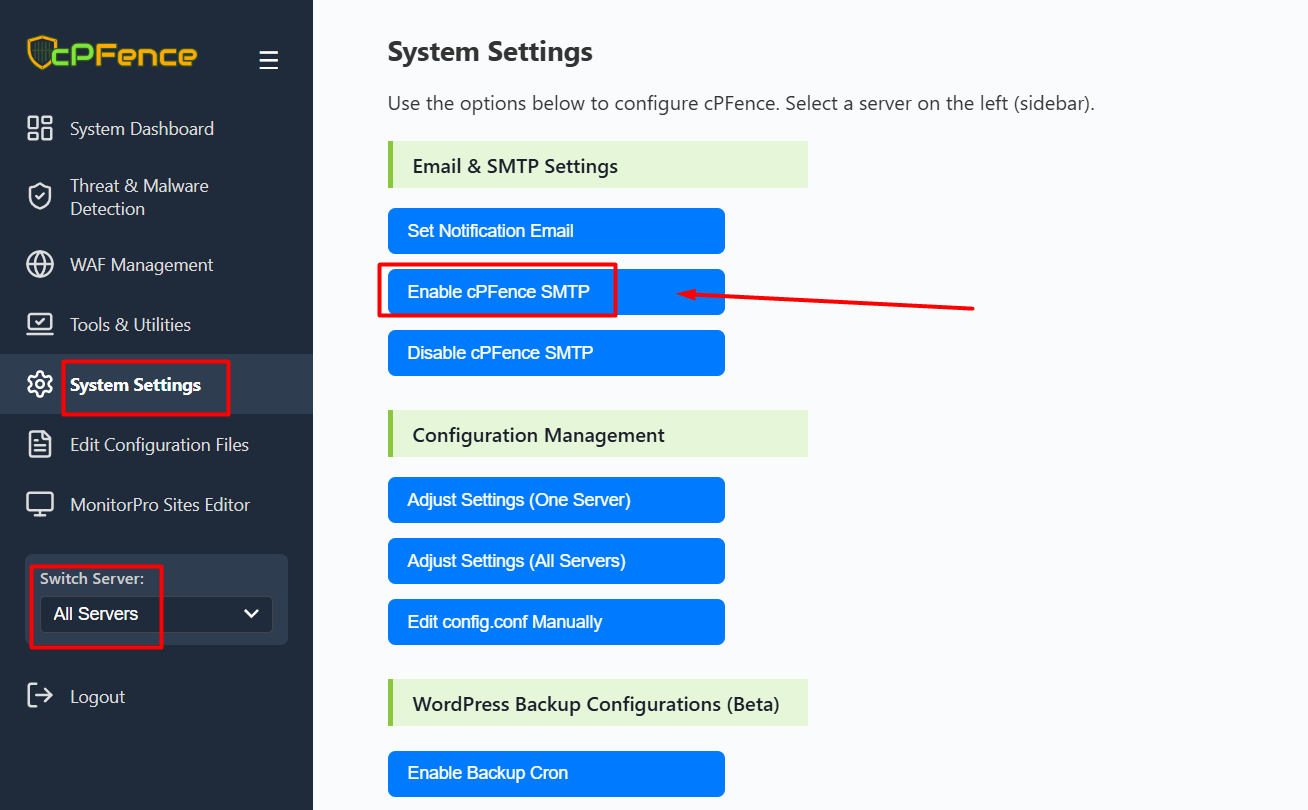
- Go to System Settings from the left sidebar.
- Click on Enable cPFence SMTP.
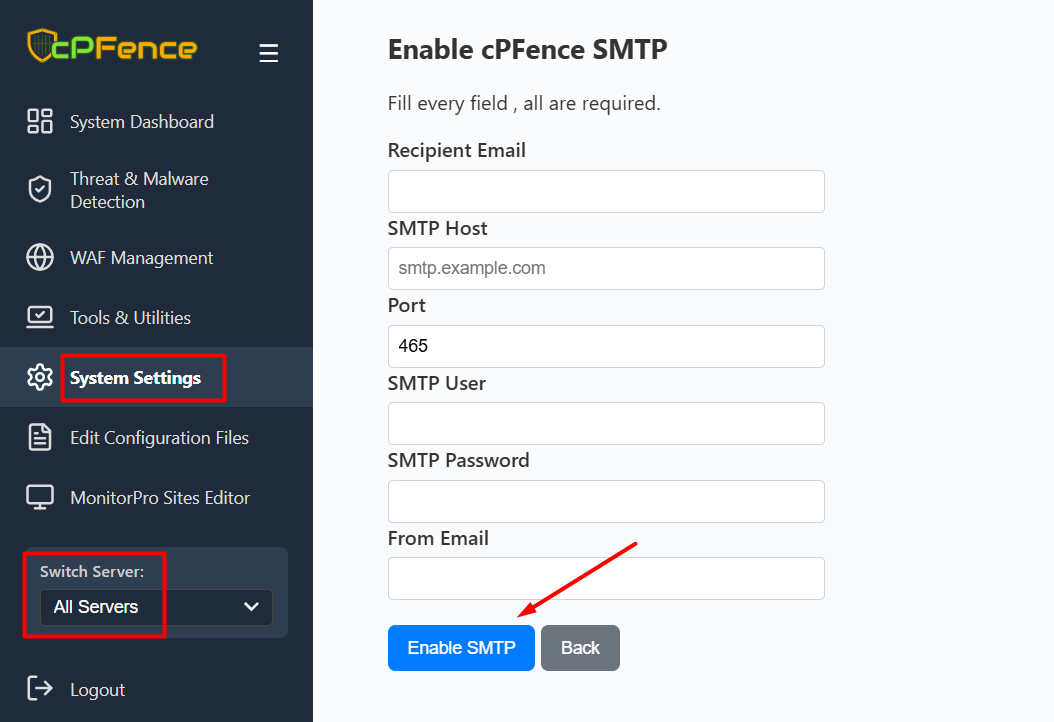
- Fill in all required fields:
- Recipient Email
- SMTP Host
- Port (e.g., 465 for SMTPS)
- SMTP User
- SMTP Password
- From Email
- Click Enable SMTP.
If "All Servers" is selected, this will apply the configuration to every server in your cluster at once.
Method 2: Using the CLI
Step 1: Enable SMTP for cPFence
To use your SMTP server for cPFence notifications, you’ll need to enable the feature. Run the following command to begin the setup process:
cpfence --enable-cpfence-smtpOnce the command is run, cPFence will prompt you to enter the following details:
- SMTP Host: The address of your SMTP server (e.g., smtp.yourdomain.com).
- SMTP Port: The port number to use for SMTP. Recommended options include 25, 587, 2525, or 465.
- SMTP Username: The email address or the username used to authenticate with the SMTP server.
- SMTP Password: The password for the provided email address or username.
- Sender Email: The email address that will appear as the “From” address in the notification emails.
After entering these details, cPFence will automatically configure your server to send notifications using your SMTP server.
Step 2: Test Email Sent Automatically
Once the SMTP configuration is set, cPFence will automatically send a test email to the email address you provided. You should see the following message:
Sending a test email to [your_email] to confirm the configuration...
Test email has been sent. Please check your inbox to confirm receipt.
If you don’t receive the test email, be sure to check your inbox and spam folder.
Step 3: Troubleshoot Email Delivery
If you still don't find the test email, you can check the mail logs for more details. Use the following commands to check the logs and troubleshoot any email delivery issues:
tail -f /var/log/postfix.logtail -f /var/log/mail.logFor manual testing, you can also send a test email using this command:
mailx -v -s 'SMTP Test Email from cPFence' [email protected] <<< 'This is a test email to confirm the SMTP configuration for cPFence notifications.'This command will allow you to manually verify the SMTP configuration if needed.
Read More : How to Resolve Issues with SMTP Not Sending Emails in cPFence?
Step 4: Disable SMTP (Optional)
If you prefer to switch back to the local mail system, you can disable SMTP using the following command:
cpfence --disable-cpfence-smtp
Or use the WebUI for bulk actions :
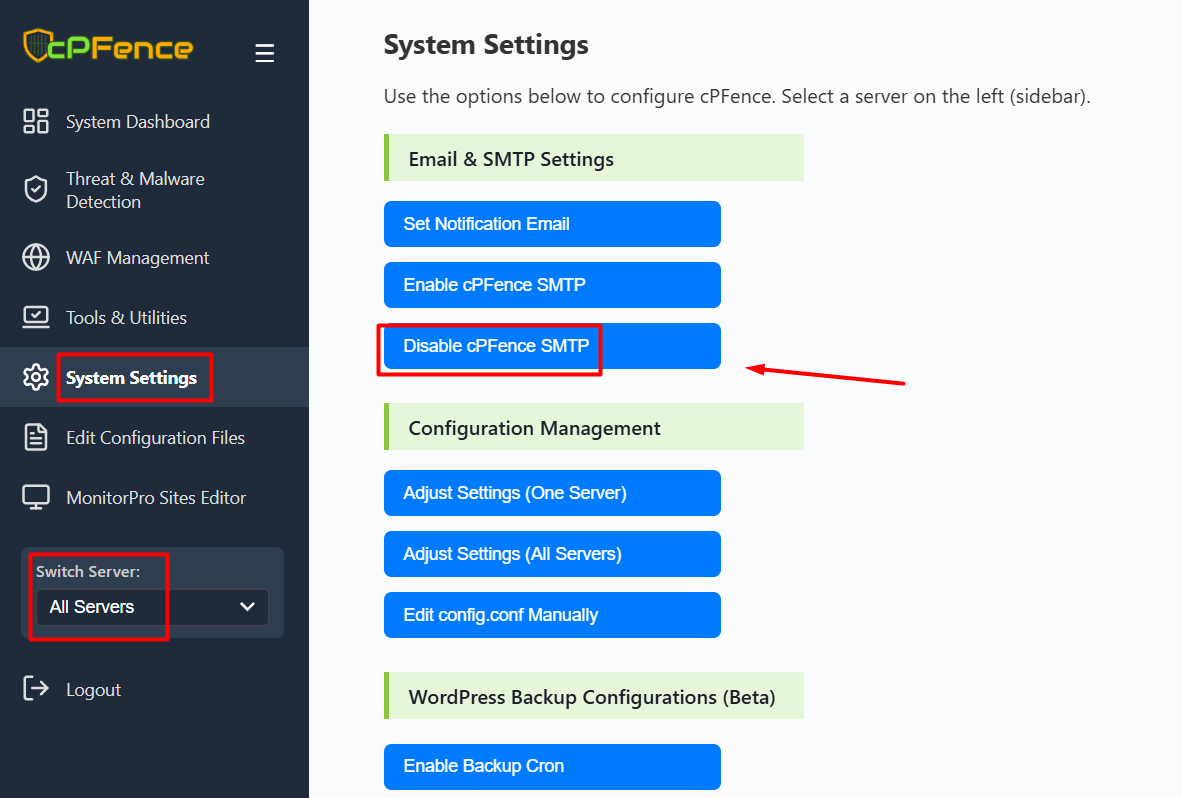
This will revert cPFence to using the local mail utility for sending notifications.
Need Further Assistance?
If you encounter any issues or need additional help, feel free to reach out to our support team via your client portal.
