The new Captcha WAF module provides one-click, server-level CAPTCHA protection for your login pages. Bots are intercepted offsite—no user interaction required.
Key Benefits:
- Blocks automated brute‑force, dictionary, and credential‑stuffing bots
- No impact on real user experience
- Instant, server-wide or per-domain enable/disable
- Supports all popular CMS and custom login URLs
- Silent, offsite interception reduces server load
Using the WebUI
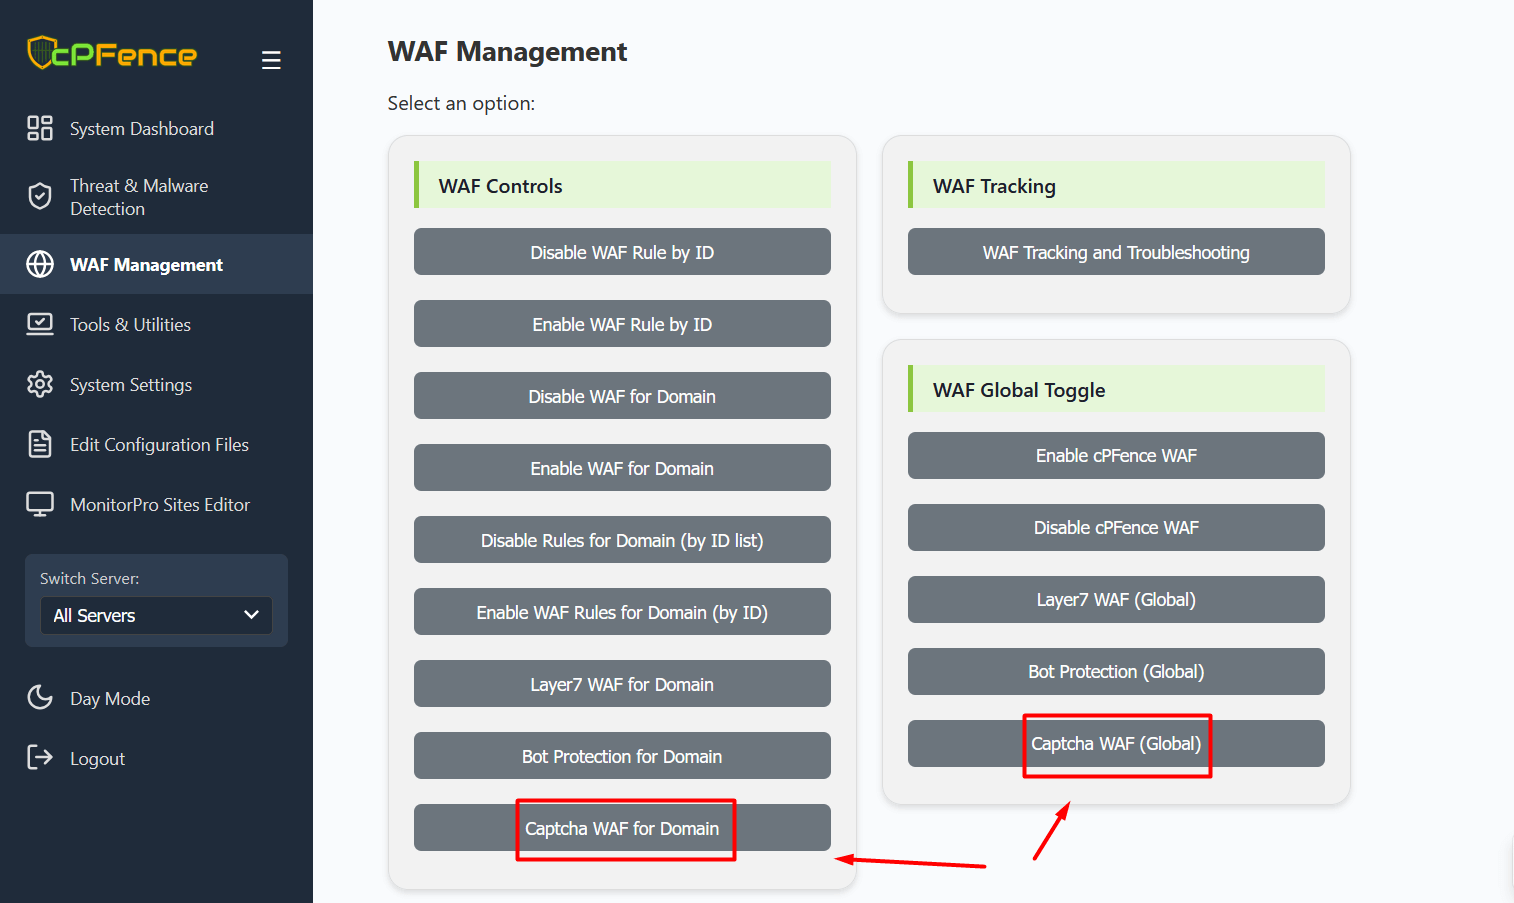
- Open the cPFence WebUI on your Main Control Panel server and select WAF Management.
- In the WAF Global Toggle section, click Captcha WAF (Global) to enable or disable server-wide protection.
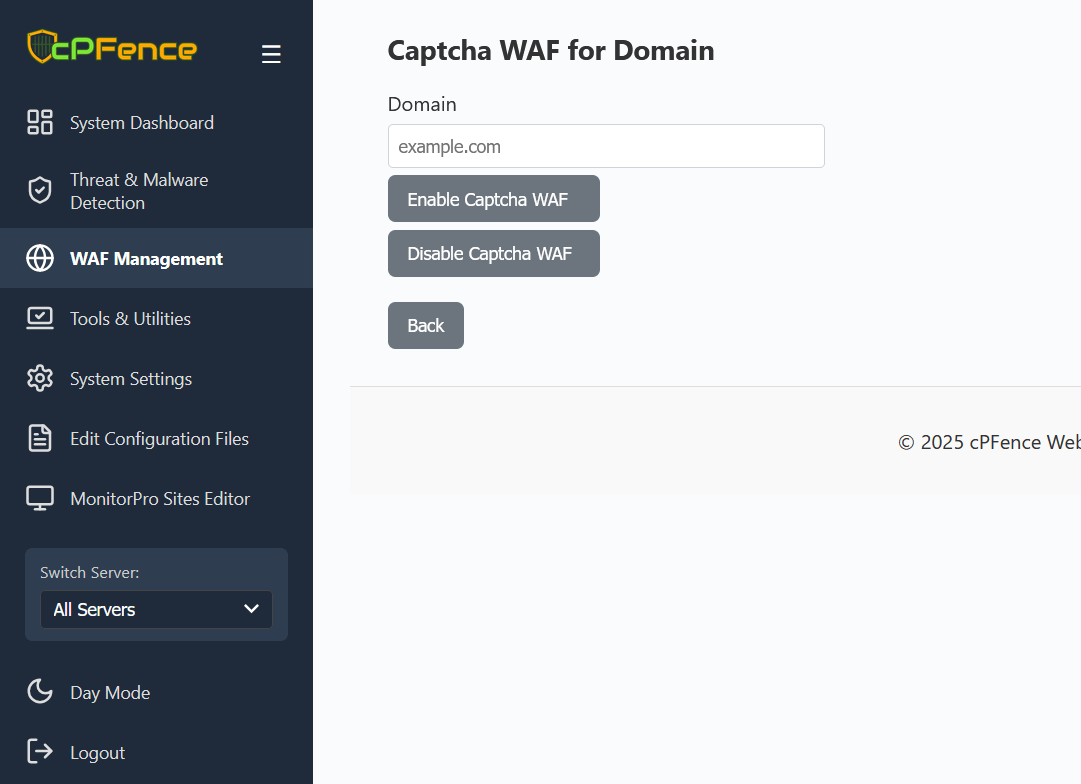
- In the WAF Controls section, click Captcha WAF for Domain, enter your domain (e.g.,
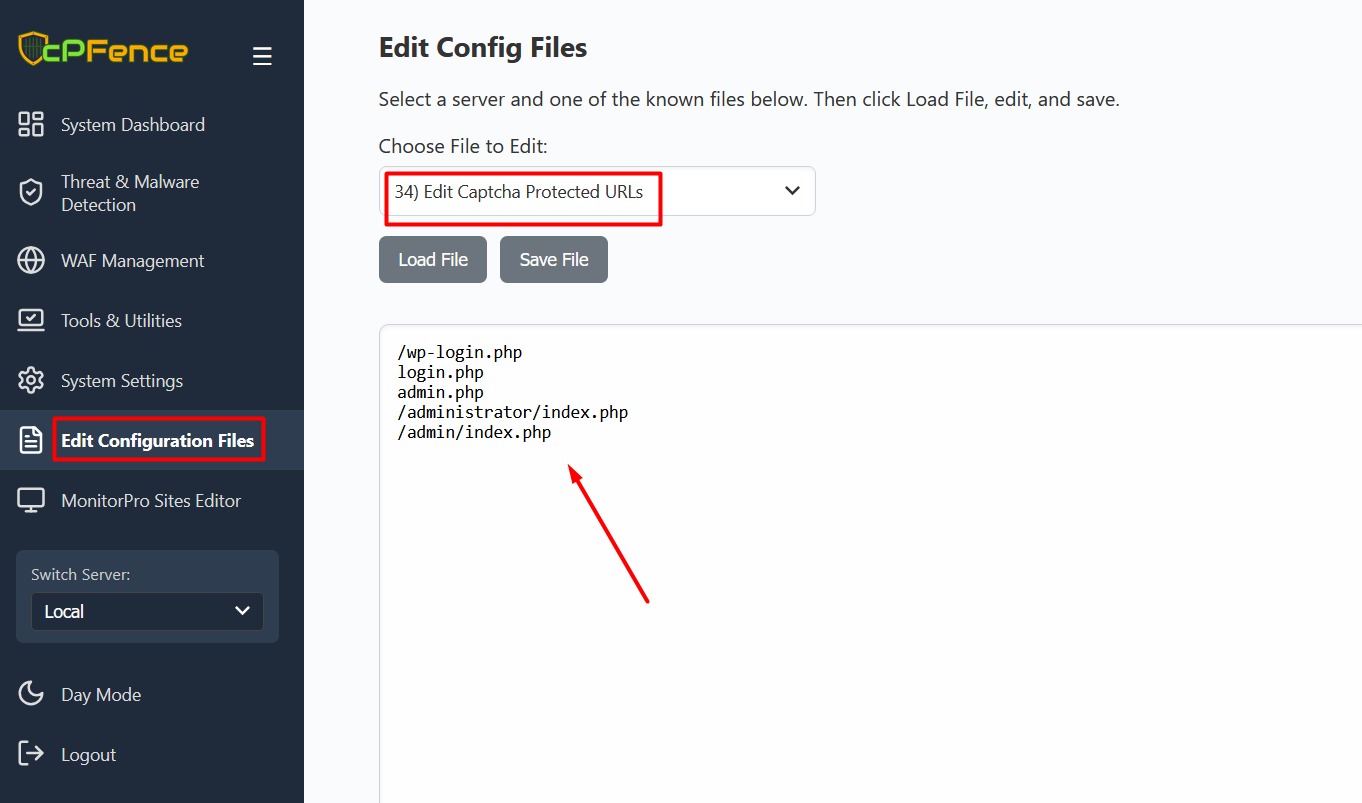
a.com) and click the button to enable or disable per-domain protection. - To customize protected paths, go to Edit Configuration Files → Edit Captcha Protected URLs. From there, add or remove any login paths you want protected, or edit
/opt/cpfence/app/cpfwaf/userdata_login_pagesdirectly.
Restart the Web Server
To apply these changes, restart your web server:
systemctl restart nginx.service
systemctl restart apache2.service
systemctl restart lshttpd.service
CLI Options
cpfence --enable-captcha-waf-domain DOMAIN
cpfence --disable-captcha-waf-domain DOMAIN
cpfence --enable-captcha-waf-global
cpfence --disable-captcha-waf-global
Replace DOMAIN with your actual domain name.
LiteSpeed Cache Compatibility
WP‑AutoShield now automatically disables LiteSpeed cache on login pages when Captcha WAF is active. To manage this manually, use:
cpfence --bulk-disable-ls-cache-login-page
cpfence --bulk-enable-ls-cache-login-page
Configuration File Option
You can also set this option in /opt/cpfence/config.conf:
autoshield_disable_ls_cache_login_pageDisables LiteSpeed cache on login pages for every WordPress site daily. (Recommended when using cPFence WAF Captcha)
Need Further Assistance?
If you encounter any issues or need additional help, feel free to reach out to our support team via your client portal.
