Note: Please use the Blacklist/Whitelist Countries feature judiciously. Limiting this setting to 2 or 3 countries is recommended, as applying it to a large number of countries may negatively impact system performance.
This guide explains how to whitelist or blacklist entire countries in cPFence. You can manage these settings either through the browser-based WebUI, the command line, or by editing the configuration file (useful for bulk changes).
Tip: You can find the correct ISO codes at ISO 3166-1 alpha-2.
Part 1: Using the cPFence WebUI
Open the cPFence WebUI on your Main Control Panel server.
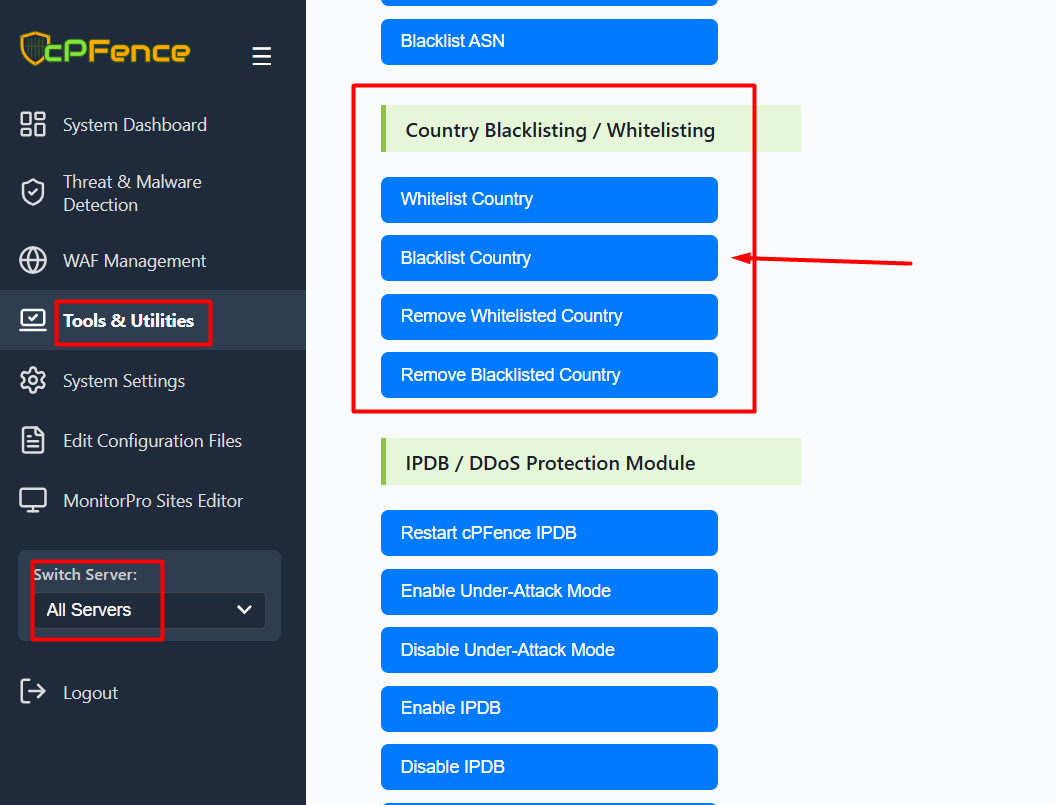
- Go to Tools & Utilities in the left sidebar.
- Under the Country Blacklisting / Whitelisting section, choose one of the following options:
- Whitelist Country
- Blacklist Country
- Remove Whitelisted Country
- Remove Blacklisted Country
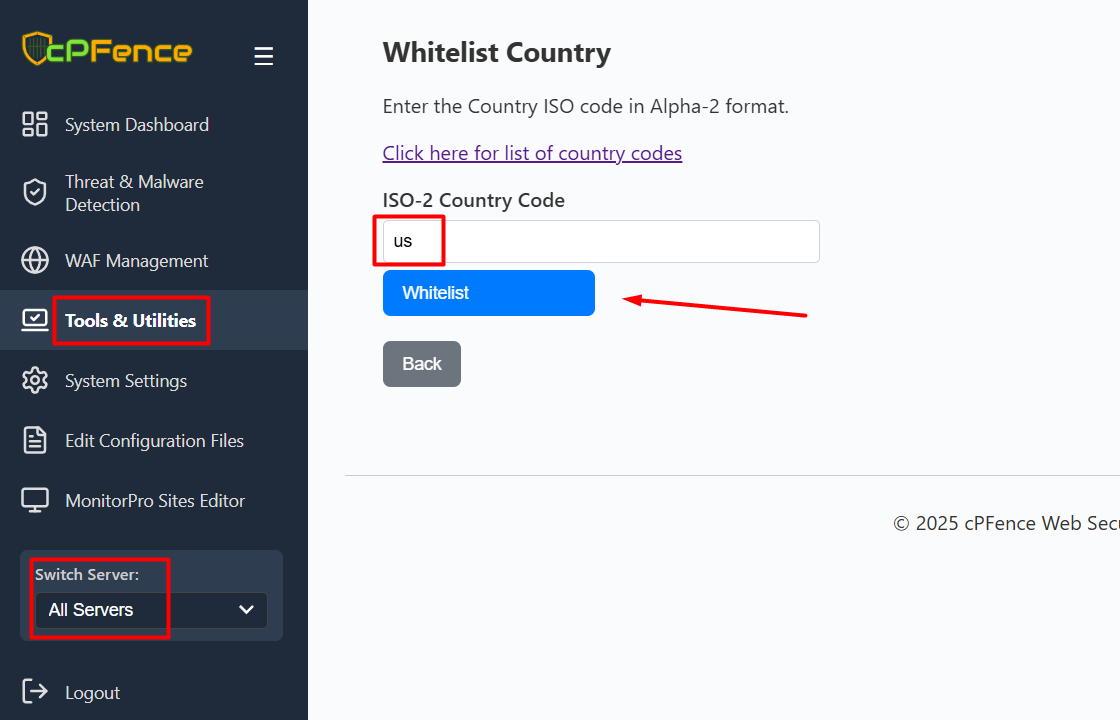
- Enter the ISO-2 country code and click the button (e.g., Whitelist or Blacklist).
The screenshots above are samples—use the same steps for all country management actions (whitelist, blacklist, remove from whitelist, remove from blacklist).
Part 2: From CLI
Whitelist a Country
To add a country to the whitelist, use the following command:
cpfence --whitelist-country ISOCODEReplace ISOCODE with the two-letter ISO code (e.g., us for United States).
Blacklist a Country
To add a country to the blacklist, use:
cpfence --blacklist-country ISOCODEReplace ISOCODE with the country code (e.g., cn for China).
Remove Country from Whitelist
cpfence --del-whitelist-country ISOCODEReplace ISOCODE with the ISO code (e.g., us).
Remove Country from Blacklist
cpfence --del-blacklist-country ISOCODEReplace ISOCODE with the ISO code (e.g., cn).
Part 3: From Configuration File
For bulk deployment across several servers, you can edit the configuration file directly. Edit, copy it to your servers, then run cpfence --restart to apply changes.
Blocked Countries
Add ISO codes below this line:
# BLOCKED COUNTRIES : (DO NOT DELETE THIS LINE! - Your blocked countries should go below this line)
BLOCKED_COUNTRY=cn
BLOCKED_COUNTRY=ru
Whitelisted Countries
Add ISO codes below this line:
# WHITELISTED COUNTRIES : (DO NOT DELETE THIS LINE! - Your whitelisted countries should go below this line)
WHITELISTED_COUNTRY=us
WHITELISTED_COUNTRY=fr
Applying Changes
Restart cPFence to load your new settings:
cpfence --restartImportant Notes
- Only use the configuration file editing method for new servers or when you’re OK with resetting IP settings.
- Whitelisted countries bypass all IPDB/DDoS protections—use with caution.
Need Further Assistance? If you encounter any issues or need additional help, feel free to reach out to our support team via your client portal.
