
Support Users allow you to delegate limited access to your cPFence WebUI without sharing the main admin account. You can control exactly which servers and features each user can access.
Quick Start
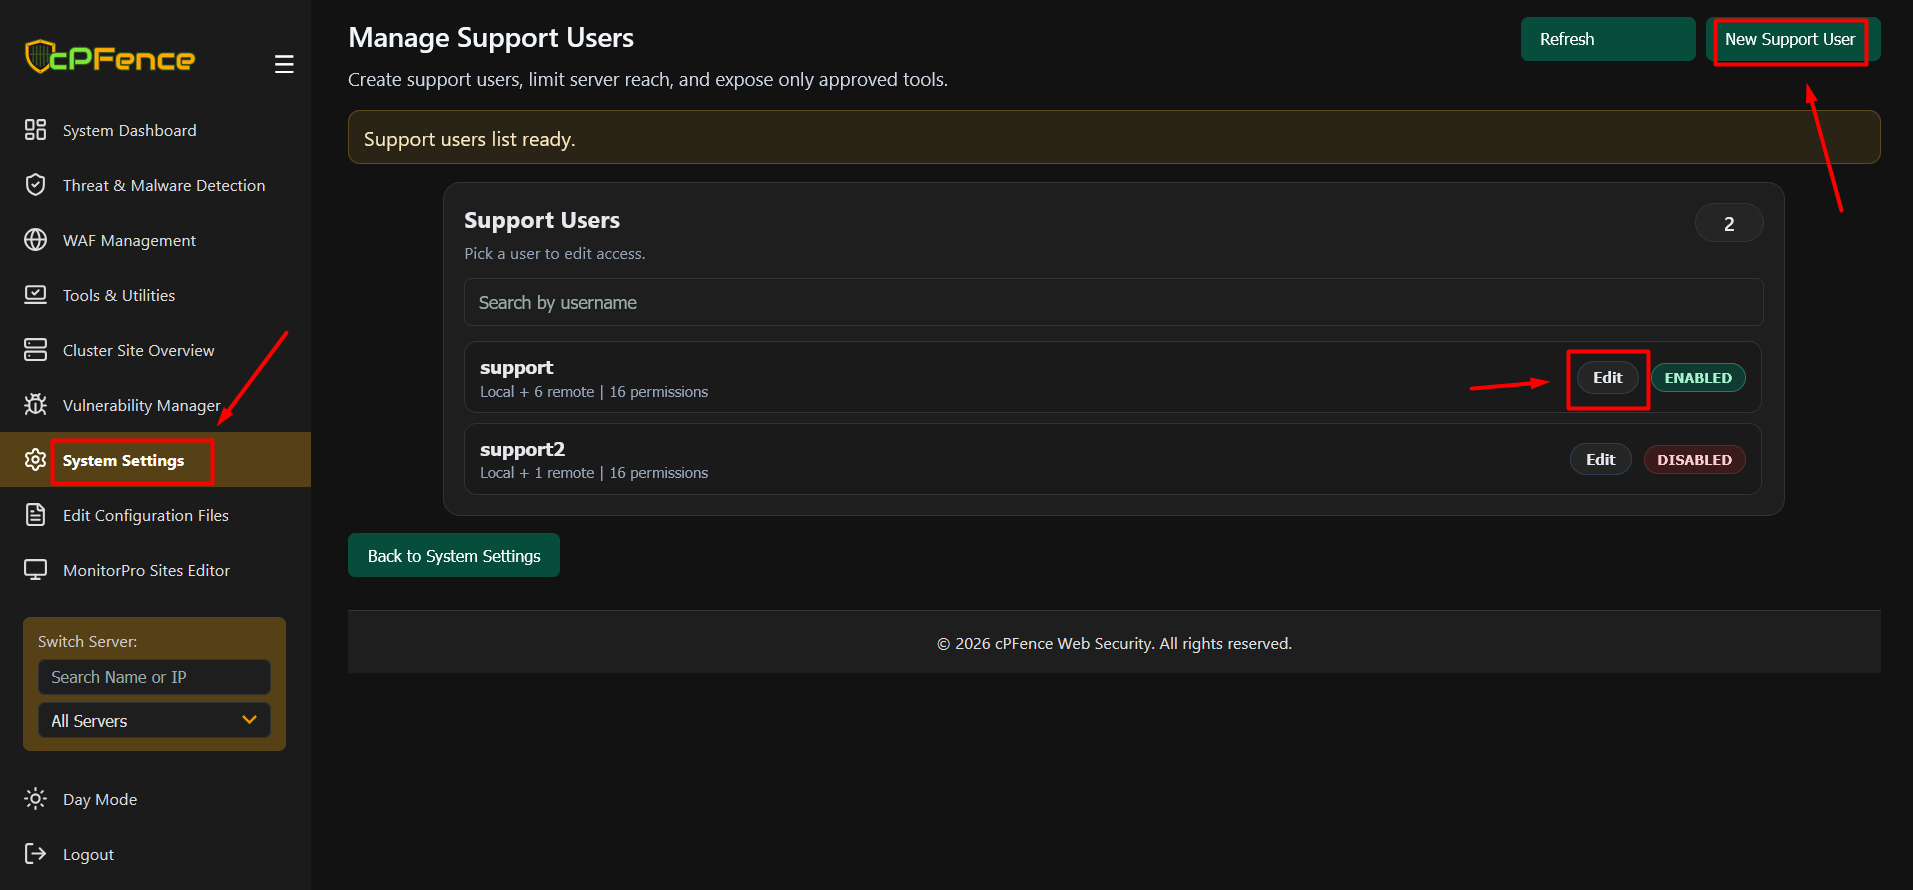
The WebUI automatically creates a default “support” user (disabled by default).
- Go to System Settings → Manage Support Users
- Click Edit on the
supportuser - Set a secure password
- Adjust server access and permissions as needed
- Click Save User
Enable the user, and it’s ready to log in.
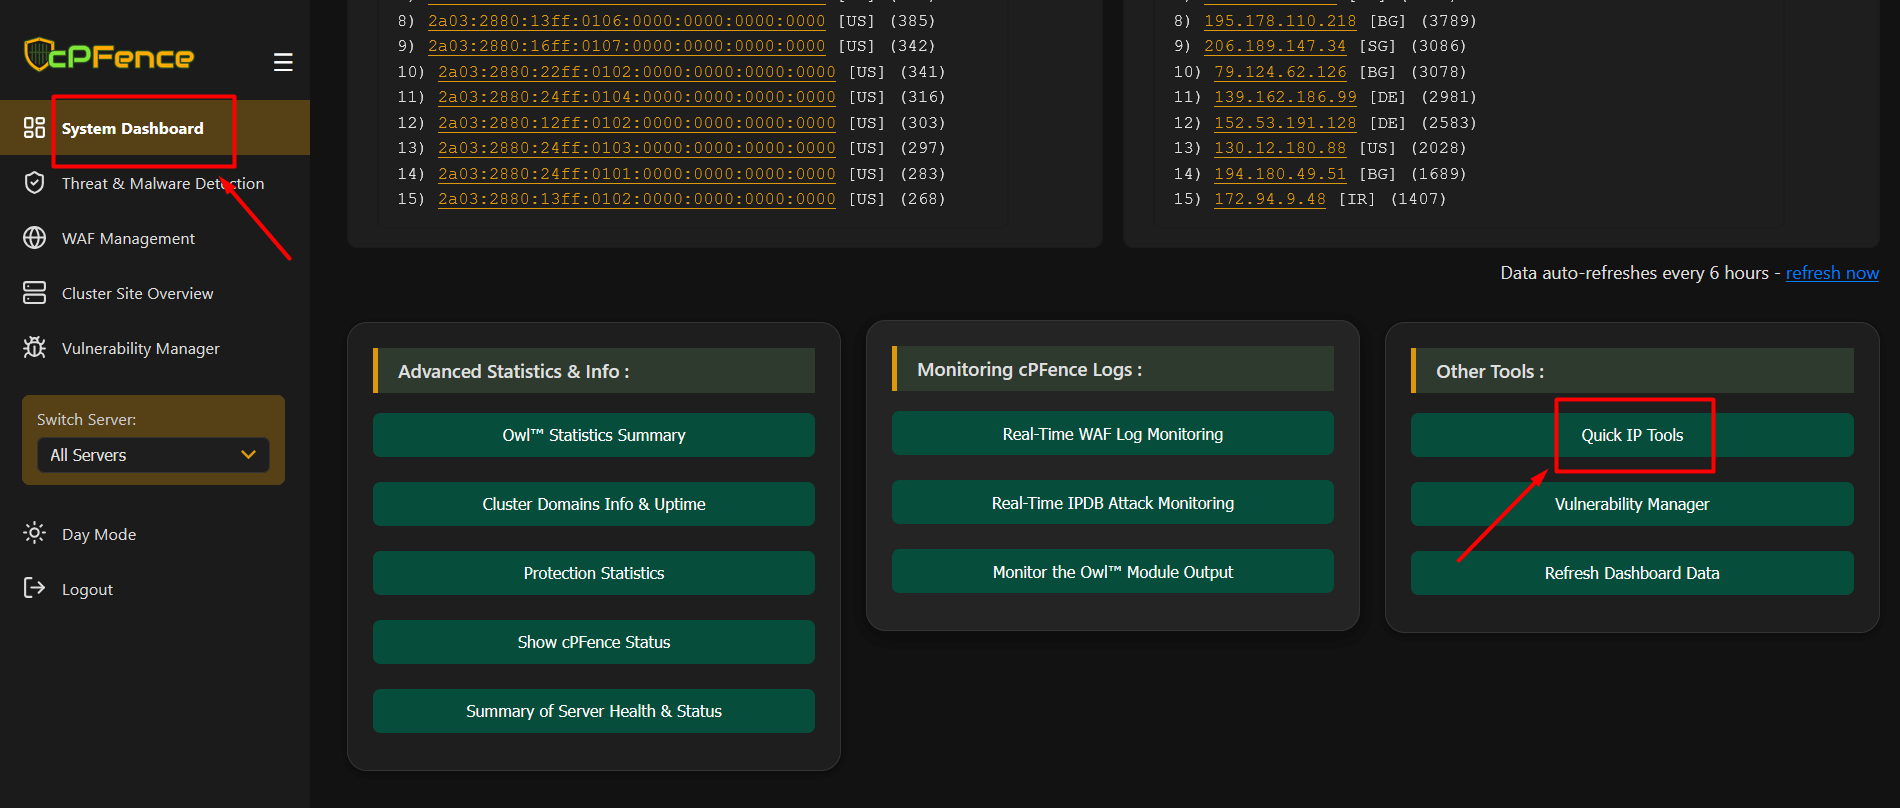
Once the support user is logged in, he will be presented with a filtered WebUI with limited access. To access IP tools, he can go to Dashboard > Quick IP Tools.
Creating or Editing a Support User
- Set a username
- Assign a strong password
- Keep the user Enabled to allow login
You can disable a user at any time without deleting the account.
Assign Server Access
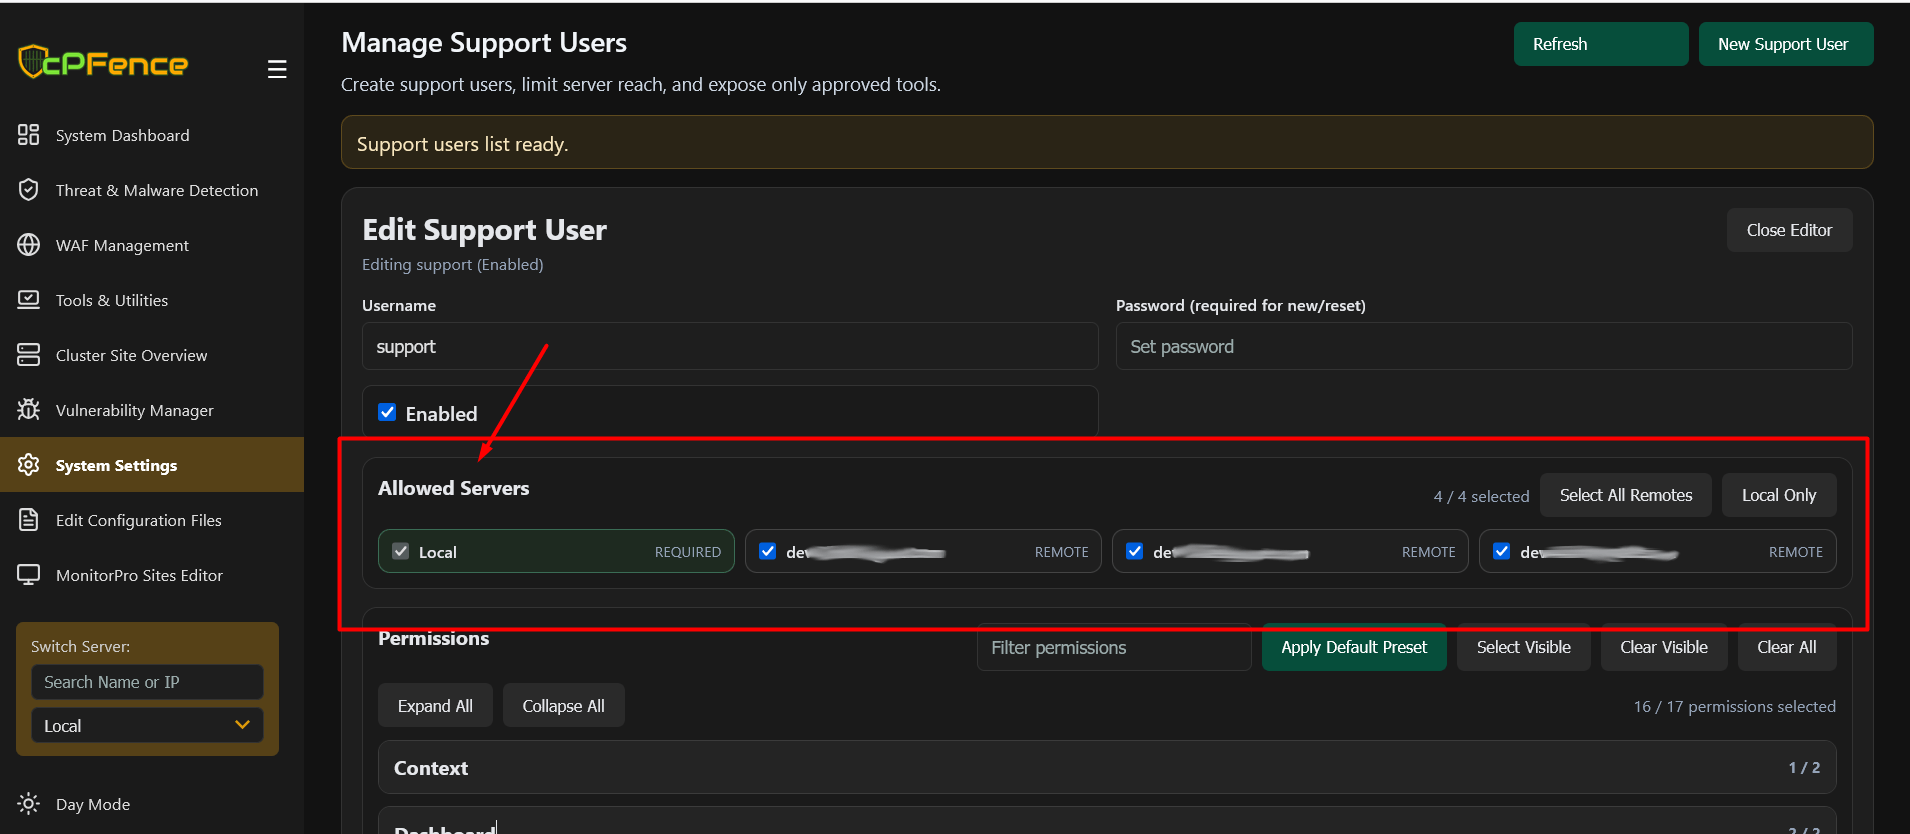
Under Allowed Servers, select which servers the user can access:
- Specific remote servers
- Or all remote servers
Users will only see and manage the servers you assign.
Configure Permissions
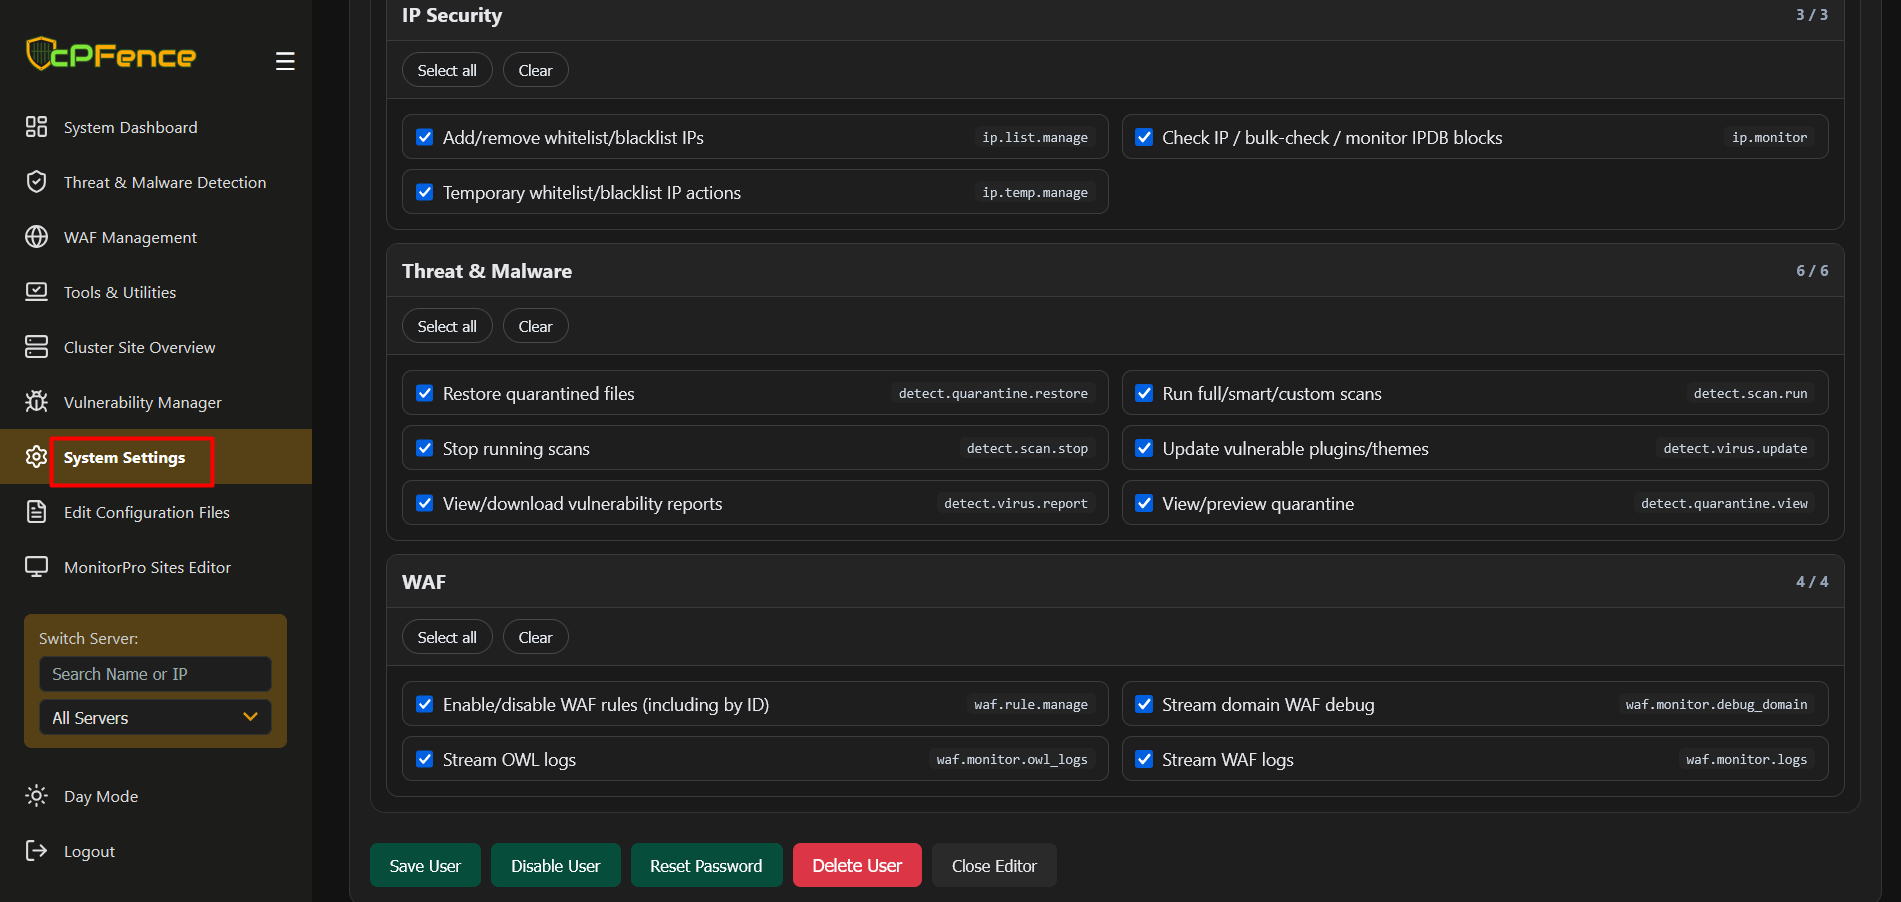
Permissions are grouped by sections such as:
- Dashboard
- IP Security
- Threat & Malware
- WAF
- And more
- Grant only the permissions required
- Use Default Preset if needed
- Click Save after making changes
Need Further Assistance?
Visit our Knowledgebase or contact our support team for help.