
Has your WordPress site been infected, and cPFence reported malware or other issues? Don’t worry, follow these steps to clean your site and secure it from future threats.
Step 1: Fix File Permissions and Ownership
Hackers often modify file and folder permissions to block security tools or hide malicious code. Before making any other changes, verify and fix your site’s file permissions so cPFence and WordPress can function correctly.
Start with a dry run to safely check what needs to be fixed:
cpfence --fix-permissions-dry
This command scans your server and lists any files or directories with incorrect ownership or permissions without applying changes. Review the output carefully, then run:
cpfence --fix-permissions
to automatically correct ownership issues and restore proper access. Once ownership is fixed, ensure secure WordPress permissions by running:
cpfence --bulk-set-wp-permissions
This applies recommended file and directory permissions for WordPress installations so security tools like cPFence can protect your sites effectively.
Step 2: Clean Cron Jobs, Restore Core Files, and Check Dotfiles
Hackers often modify core files, so restore them before scanning or cleaning. Run these commands as the site owner (replace username with the account that owns the site files):
su - usernamecrontab -e
Delete any infected cron jobs immediately. Check again after five minutes, as some malware recreates cron entries.
Contact support if you need help.
Before restoring WordPress, also inspect the user’s shell dotfiles for injected commands or backdoors:
/var/www/uuid/.bashrc/var/www/uuid/.profile
Then restore WordPress core files:
cd public_html/wp core download --skip-contentwp core verify-checksums
The --skip-content option preserves uploads and custom content. wp core verify-checksums confirms core files match WordPress originals.
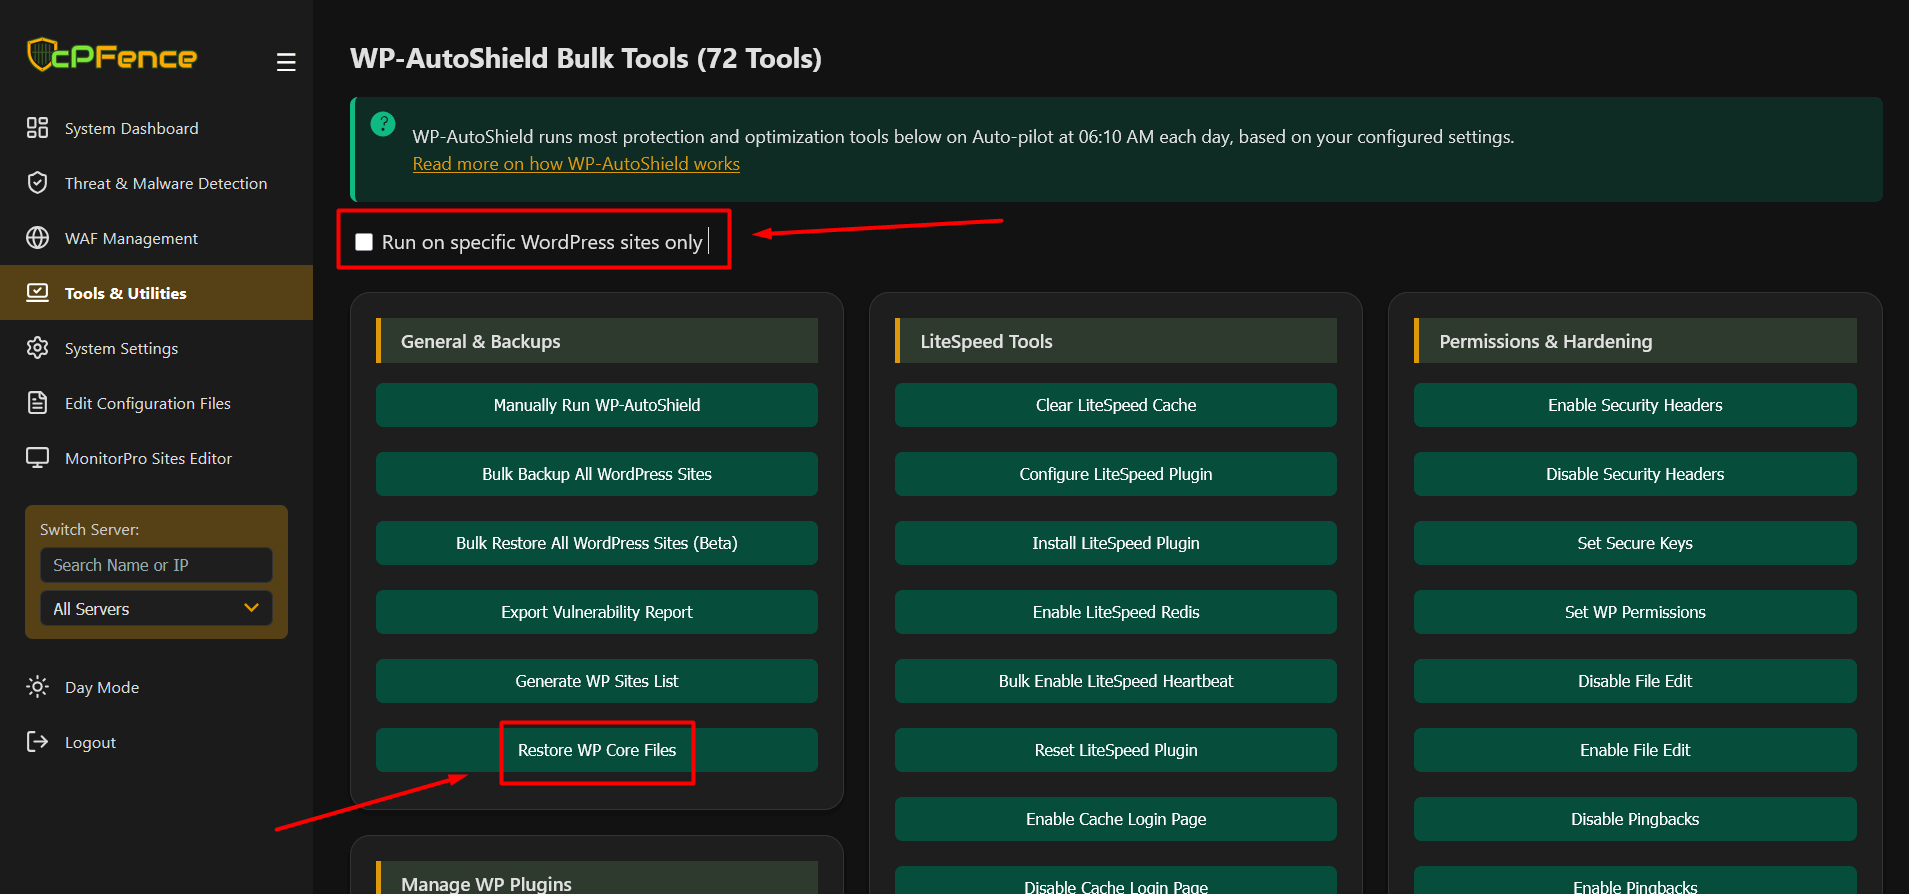
Alternatively, use the cPFence WebUI: go to Tools & Utilities > WP-AutoShield Bulk Tools and click the Restore WP Core Files button in the General & Backups column. Use the Run on specific WordPress sites only checkbox to target a single site.
Step 3: Scan and Clean the Infected Site
After permissions and core files are restored, run a custom scan on the infected path to clean or quarantine files.
cpfence --custom-scan PATH
Custom scan runs a full check on the specified path or files. It will remove or quarantine infected items (if enabled) and provide a detailed report.
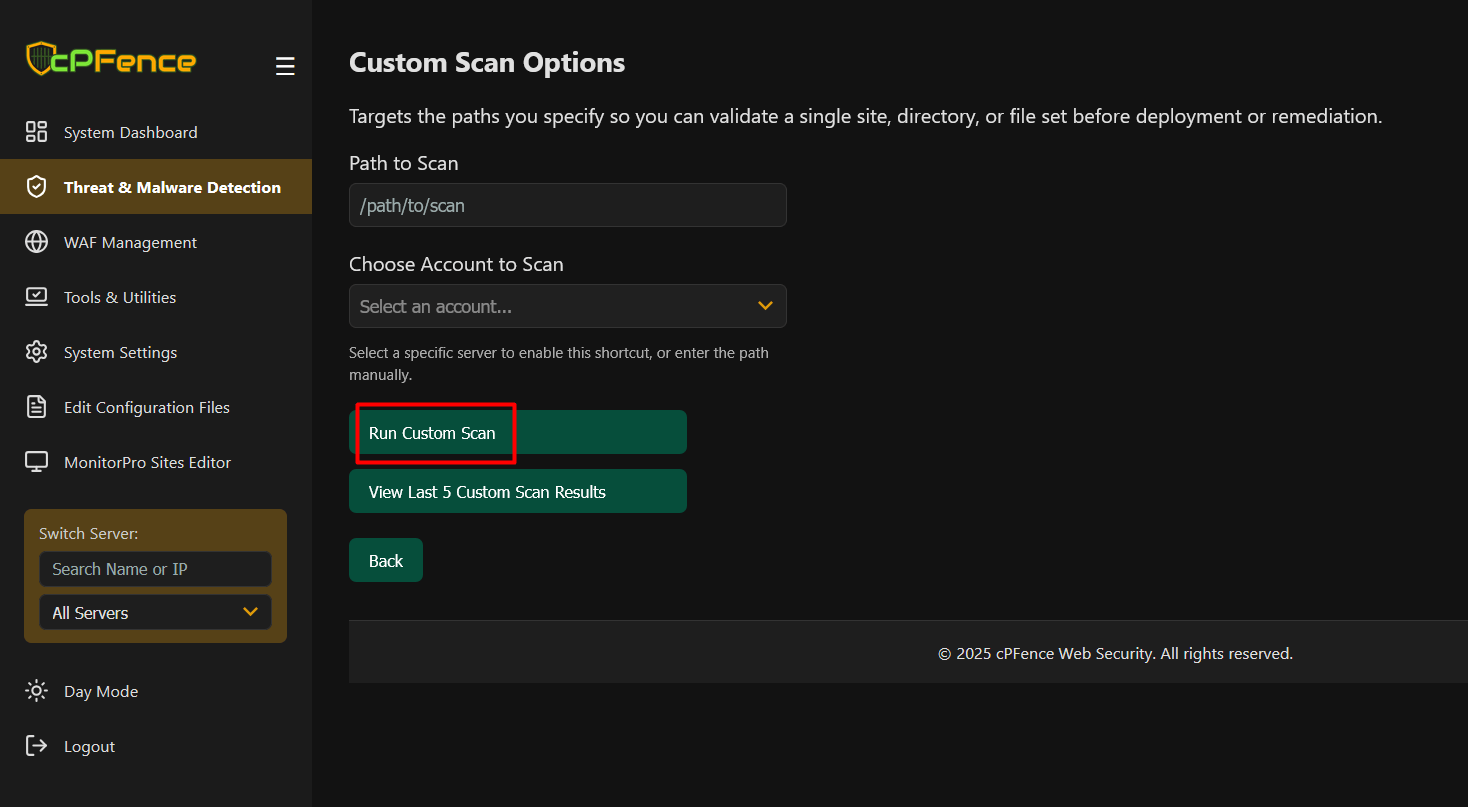
Alternatively, use the cPFence WebUI: go to Threat & Malware Detection > Custom Scan Options and choose the account and click the Run Custom Scan button
Step 4: Reset Admin and Database Passwords (can be done from WebUI)
Reset all WordPress admin and database passwords to lock out any unauthorized access. This includes:
- Admin dashboard accounts
- Database user passwords (update
wp-config.phpafter changing DB password)
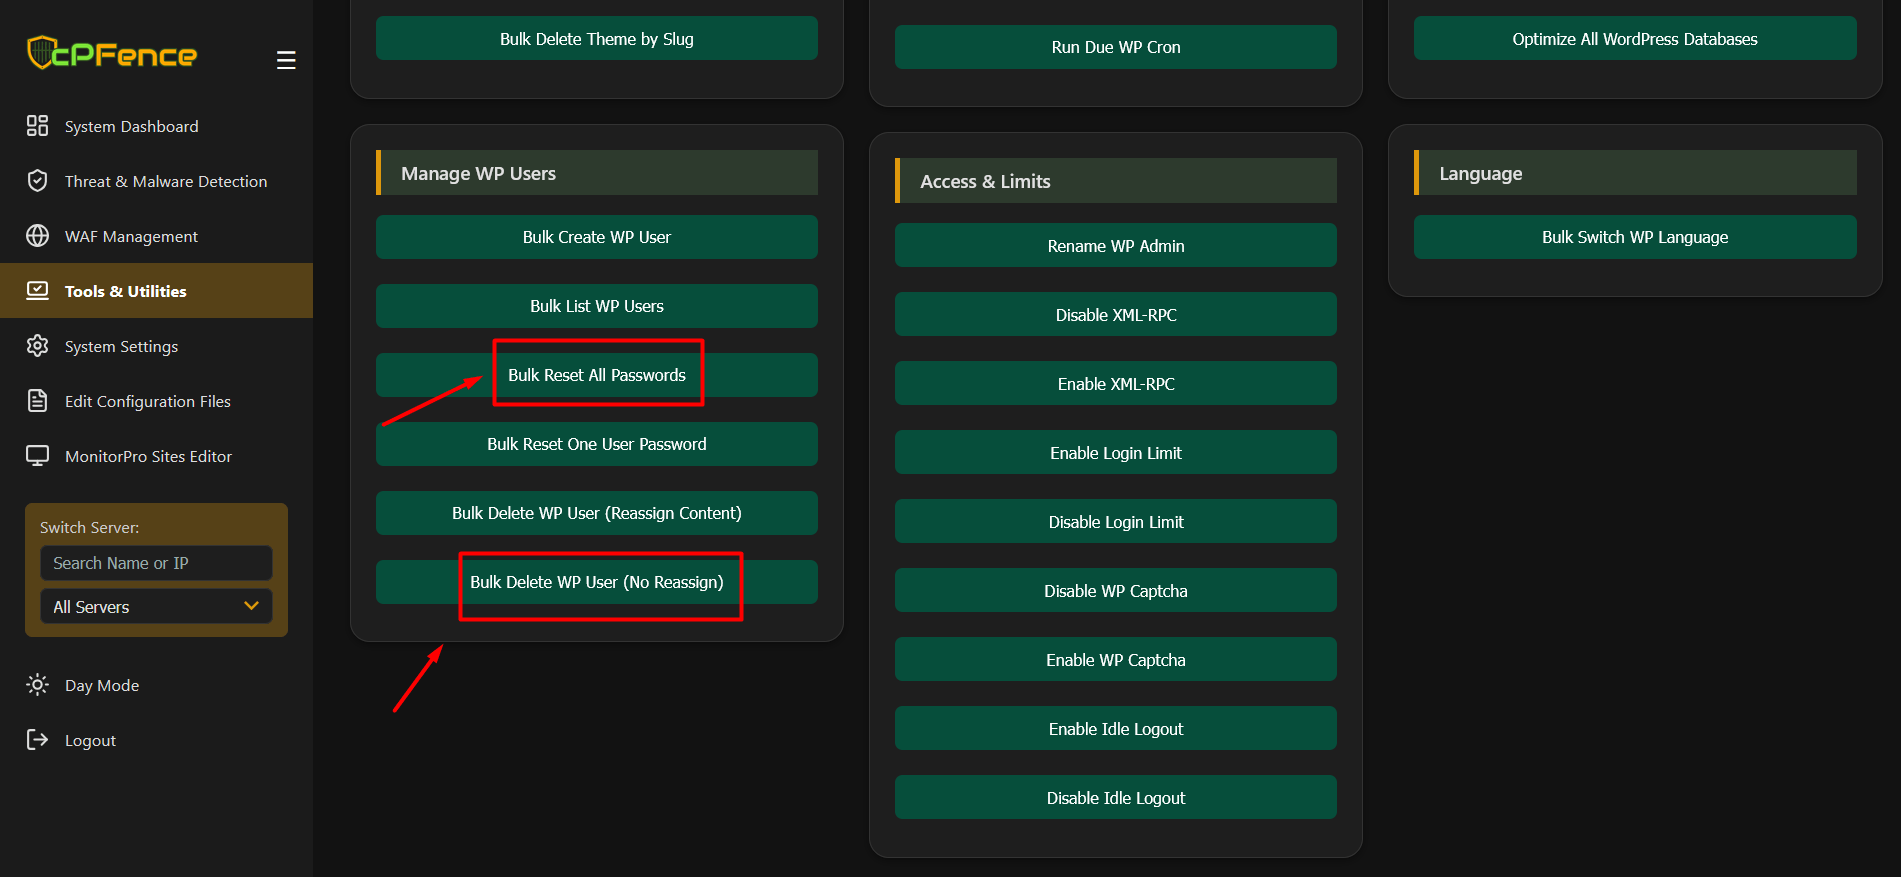
You can do this quickly from the cPFence WebUI. In the WebUI go to Tools & Utilities > WP-AutoShield Bulk Tools then open the Manage WP Users panel. Useful actions there include:
- Bulk Reset All Passwords — reset passwords across sites.
- Bulk Reset One User Password — reset a single user.
- Bulk Delete WP User (No Reassign) — remove suspicious accounts without reassigning content.
Use the Run on specific WordPress sites only checkbox at the top of the WP-AutoShield Bulk Tools page to limit actions to a single site.
Step 5: Remove Unknown Admin Accounts and Database Users
Check both WordPress and your database for unauthorized users and remove any accounts you don't recognize.
- Log into the WordPress admin panel.
- Go to Users > All Users and delete unknown or suspicious accounts.
- Check database users (Main control panel > Websites > Databases > users) and remove any you didn’t add.
Step 6: Apply Recommended cPFence Protection Settings
Enable quarantine and automatic file cleaning, and increase integrity-check frequency from the default daily to hourly to detect tampering sooner. Run:
cpfence --enable-quarantine
cpfence --enable-integrity-check
cpfence --enable-auto-file-action
cpfence --set-check-frequency hourly
These settings ensure infected files are quarantined, automatic remediation is applied when appropriate, and integrity checks run hourly to catch changes quickly.
Additional Tips for Securing Your Site
- Keep WordPress core, themes, and plugins updated.
- Remove unused or outdated plugins and themes.
- Enable two-factor authentication (2FA) for logins.
- Regularly back up your website files and database.
Secure Your WordPress Sites Automatically with WP AutoShield
WP AutoShield automates most protection and hardening tasks. Activate or manage it from the CLI:
cpfence --wp-autoshield-on
It is enabled by default for new installations and runs configured protection tasks on autopilot.
Key Features of WP AutoShield:
- Disable file editing in WP Admin: Prevent unauthorized changes to core files.
- Disable pingbacks: Stops a common method used in DDoS attacks.
- Disable XML-RPC: Protects against brute-force attacks and resource abuse.
- Use secure keys: Automatically adds secure keys to your wp-config.php file.
- Disable WP Cron: Replaces it with the more efficient built-in Enhance cron system.
- Implement brute-force protections: Adds CAPTCHA and rate-limiting to login pages.
- Ensure correct file permissions: Fixes overly permissive settings that hackers exploit.
- Harden your WordPress installation: Secures wp-includes, uploads, and wp-config.php.
- Change the default admin username: Uses a unique admin name to make brute-force attacks harder.
- Disable risky code: Blocks XSS and risky content such as iframes, embeds, or scripts in posts.
- Enable integrity checks: Monitors core files for unauthorized changes.
- Use a powerful antivirus: Provides automatic malware detection and alerts.
- Optimize heartbeat settings: Prevents load spikes caused by frequent AJAX calls.
Need Further Assistance?
If you encounter any issues or need additional help, contact our support team via your client portal.