cPFence supports configuring SMTP notifications for alerts and other system messages. You can set this up using either the WebUI or the CLI. The WebUI provides a convenient way to configure SMTP across all servers in a single click.
Method 1: Using the WebUI (Recommended)
To configure SMTP using the WebUI, follow these steps:
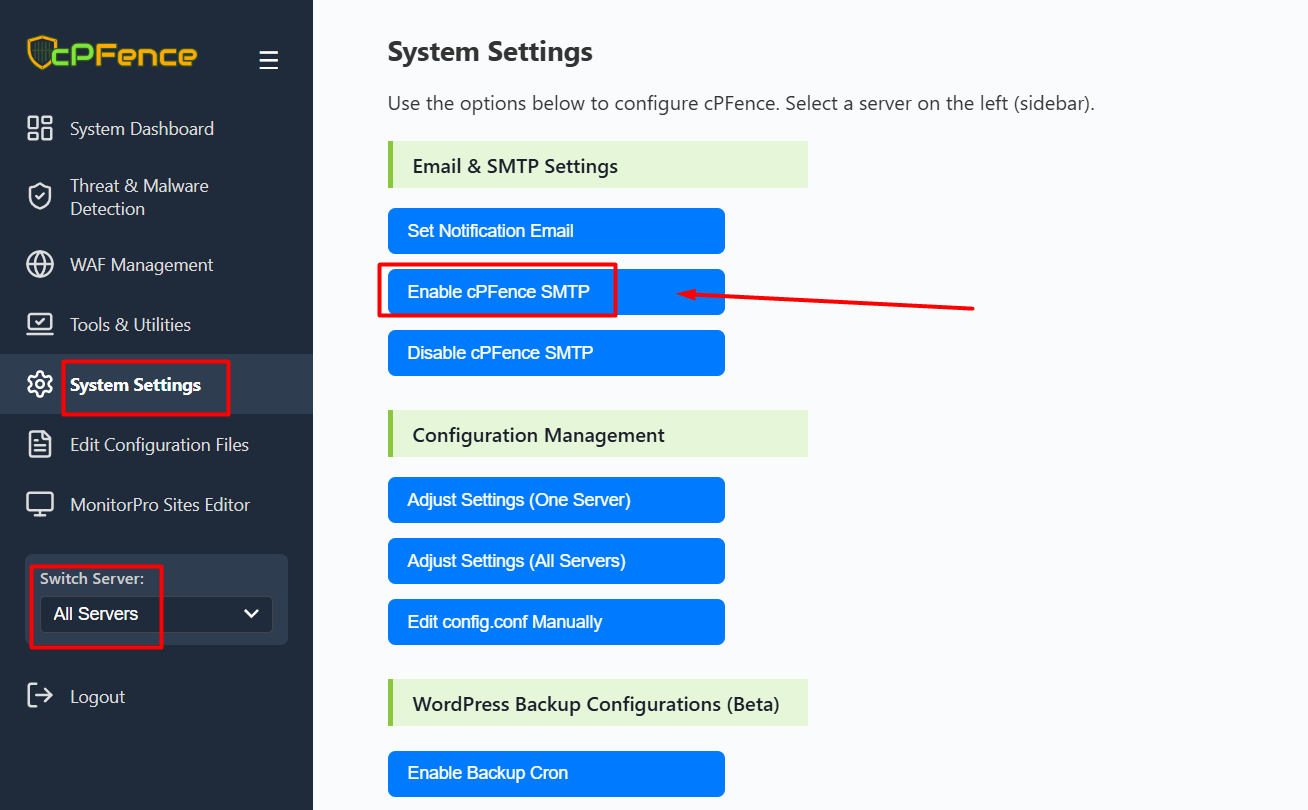
- Go to System Settings from the left sidebar.
- Click on Enable cPFence SMTP.
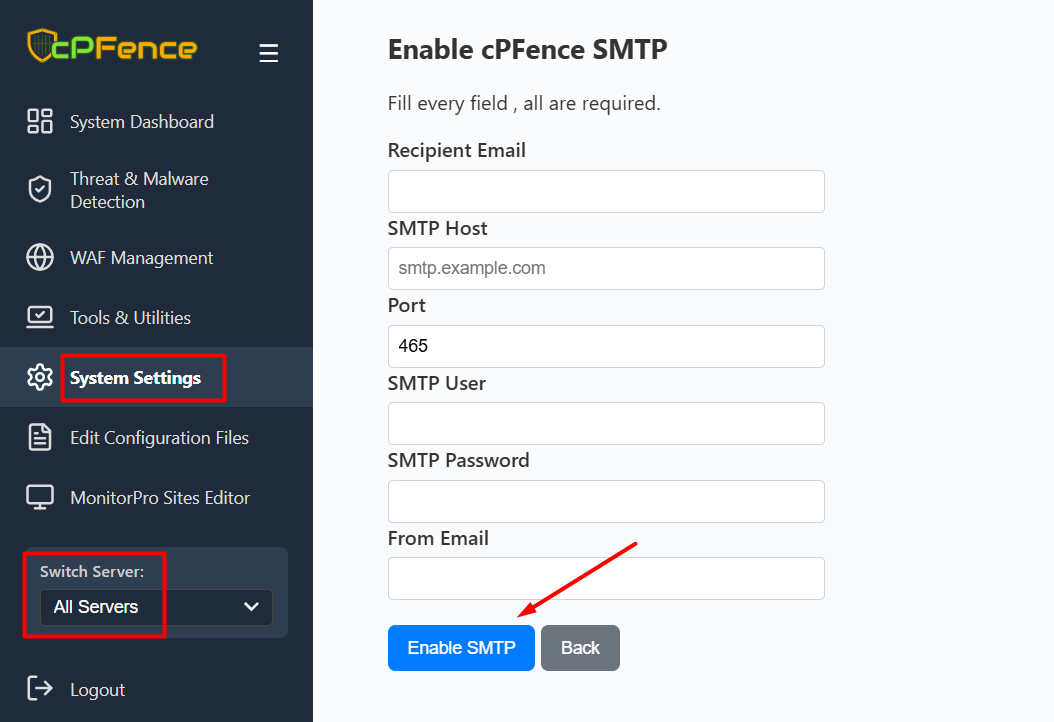
- Fill in all required fields:
- Recipient Email
- SMTP Host
- Port (e.g., 465 for SMTPS)
- SMTP User
- SMTP Password
- From Email
- Click Enable SMTP.
If "All Servers" is selected, this will apply the configuration to every server in your cluster at once.
Method 2: Using the CLI
Step 1: Configure SMTP on the First Server
Run the following command to begin the SMTP setup:
cpfence --set-email [email protected]You will be prompted to enter SMTP details interactively. This creates the SMTP configuration file used by cPFence.
Step 2: Copy Settings to Other Servers
After configuration, the SMTP settings are saved in:
/etc/s-nail.rcYou can manually copy the block below to other servers:
# cPFence SMTP Configuration - START
set v15-compat
set from="[email protected] (your-server-name)"
set mta=smtps://your-encoded-username:[email protected]:465
# cPFence SMTP Configuration - END
To apply it on another server:
- Open
/etc/s-nail.rcin a text editor:
nano /etc/s-nail.rc- Paste the copied SMTP block at the bottom of the file.
- Update the
fromline to match the current server name. - Save and exit.
Need Further Assistance?
If you encounter any issues or need additional help, feel free to reach out to our support team via your client portal.
