If you're receiving frequent email alerts about server resource usage—such as CPU, memory, disk space, or I/O—you can easily adjust the thresholds to better fit your server environment.
cPFence now offers a powerful, browser-based WebUI for managing your cluster. The WebUI is fully mobile-friendly, allowing you to adjust server thresholds from any device—including your phone or tablet. You can apply changes per server by selecting the target server from the sidebar dropdown.
Option 1: Adjust Thresholds via WebUI (Recommended)
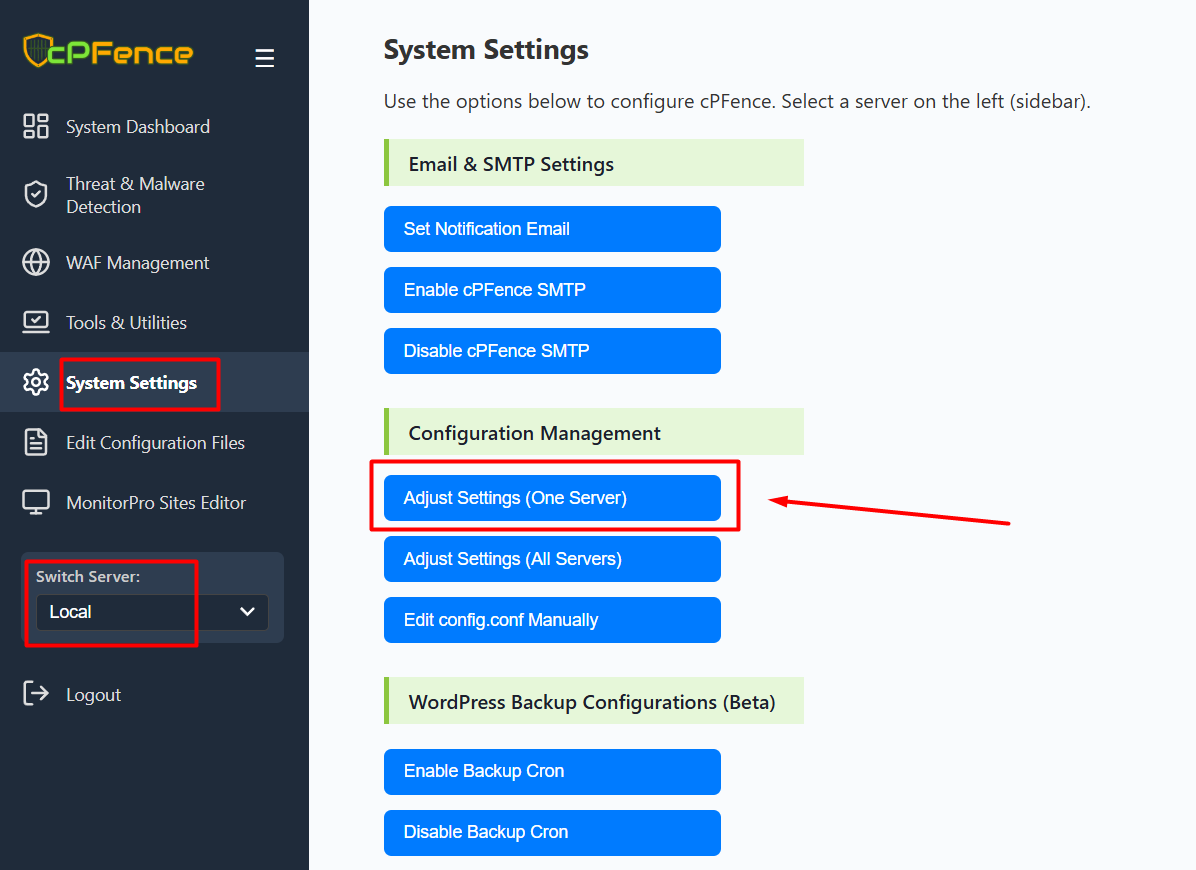
- Open the cPFence WebUI on your Main Control Panel server.
- In the sidebar, use the Switch Server dropdown to select the server you want to configure.
- Go to System Settings and click Adjust Settings (One Server) under Configuration Management.
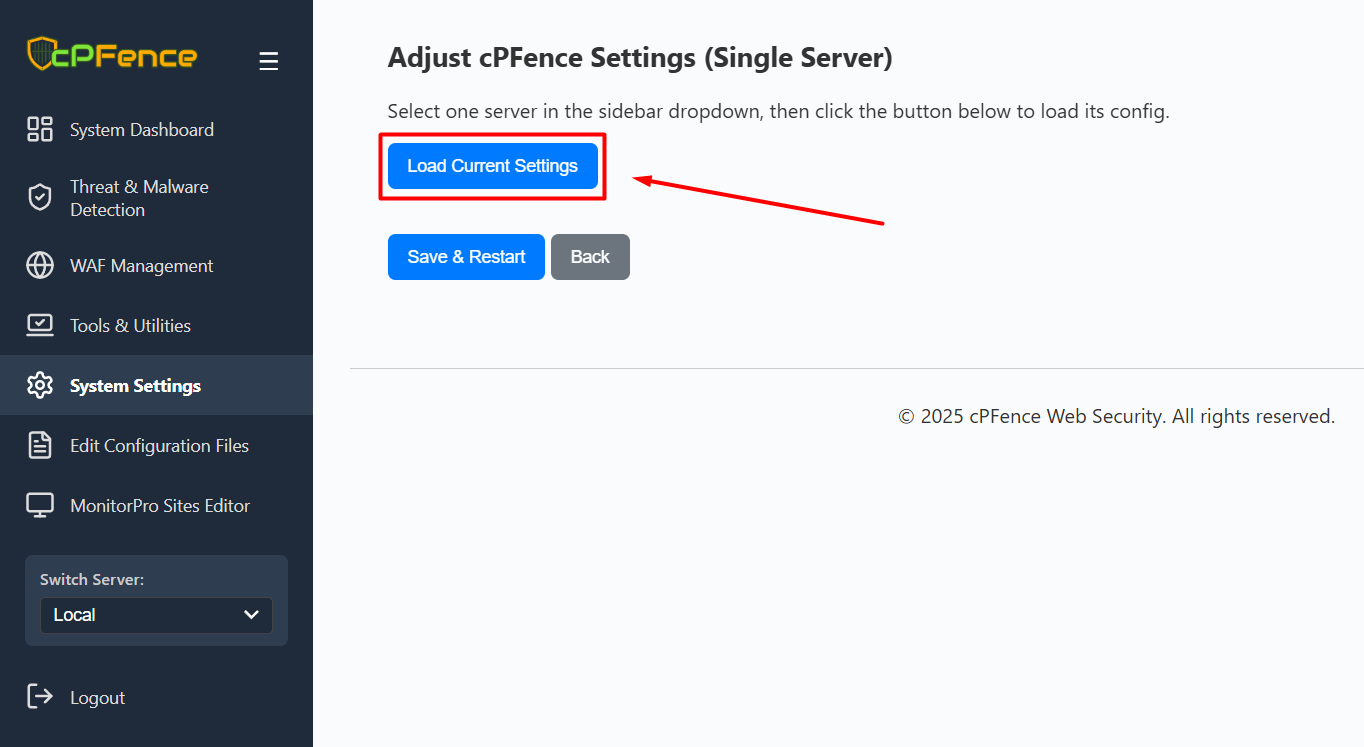
- Click Load Current Settings to view the server’s current configuration.
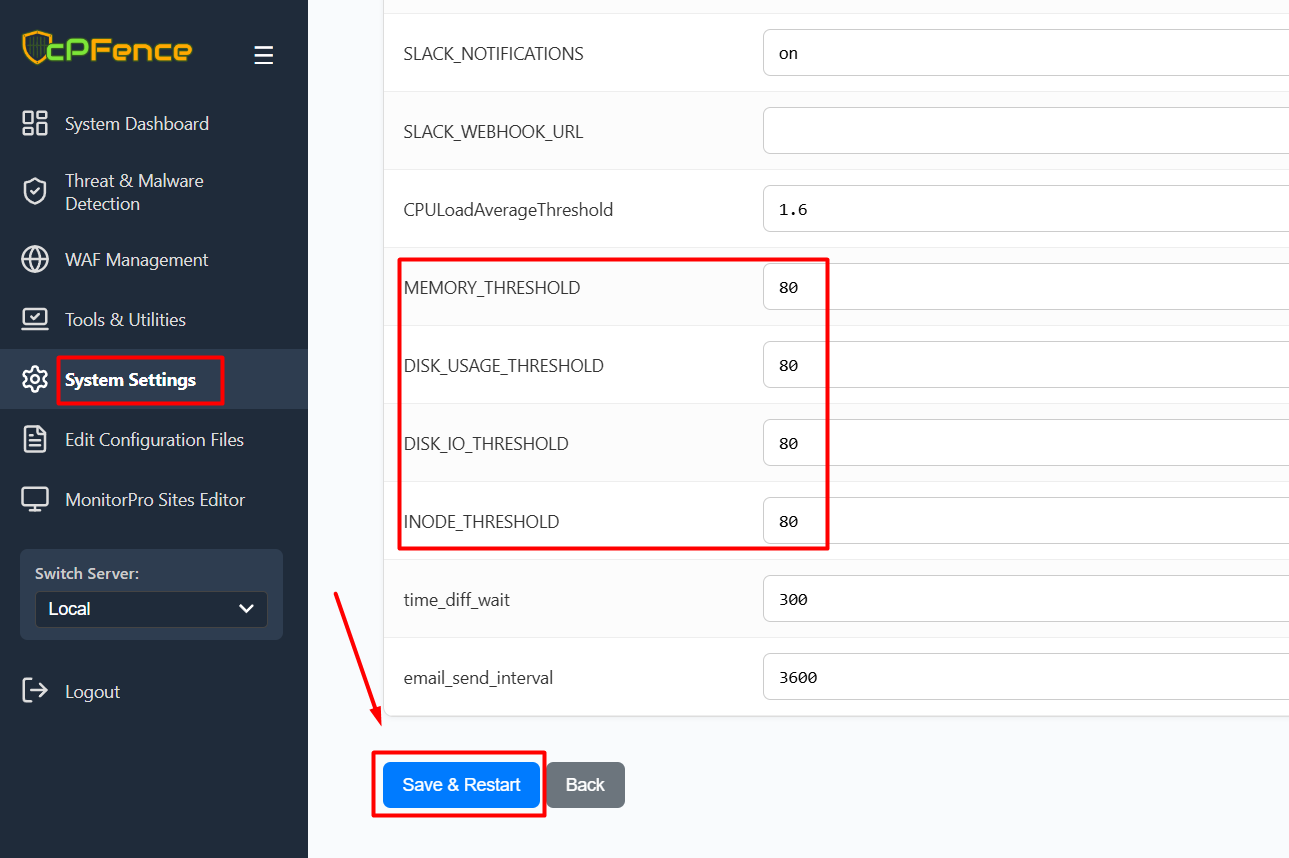
- Update the thresholds as needed for MEMORY_THRESHOLD, DISK_USAGE_THRESHOLD, DISK_IO_THRESHOLD, INODE_THRESHOLD, and any other values you wish to change.
- Click Save & Restart to apply your changes. (No service restart is needed for this)
Your updated thresholds will take effect immediately.
Option 2: Manually Edit Configuration File (CLI Method)
You can also modify the threshold settings directly by editing the configuration file:
nano /opt/cpfence/config.confLook for the following parameters:
# Set the CPU load average threshold to trigger notification emails.
CPULoadAverageThreshold="3.2"

# Set the threshold percentages for memory, disk usage, and disk I/O.
MEMORY_THRESHOLD="80"
DISK_USAGE_THRESHOLD="80"
DISK_IO_THRESHOLD="80"
INODE_THRESHOLD="80"

# Duration (in seconds) that usage must remain high before triggering notifications.
time_diff_wait="300"

# Minimum time between consecutive notification emails (in seconds).
email_send_interval="3600"
After saving your changes, cPFence will begin using the new thresholds automatically. No service restart is needed.
Need Further Assistance?
Visit our Knowledgebase or contact our support team for help.
