This guide provides instructions for enabling and disabling specific WAF (Web Application Firewall) rules in cPFence using either the command-line interface or the browser-based WebUI.
Using the WebUI
Open the cPFence WebUI on your Main Control Panel server and follow these steps:
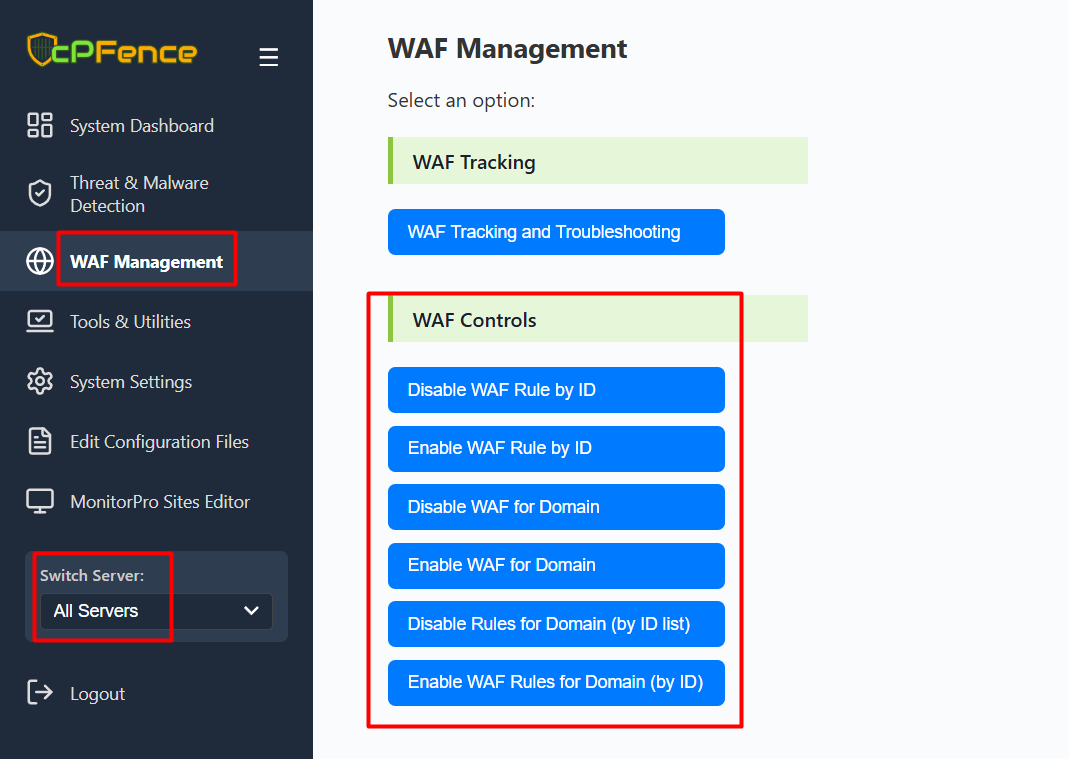
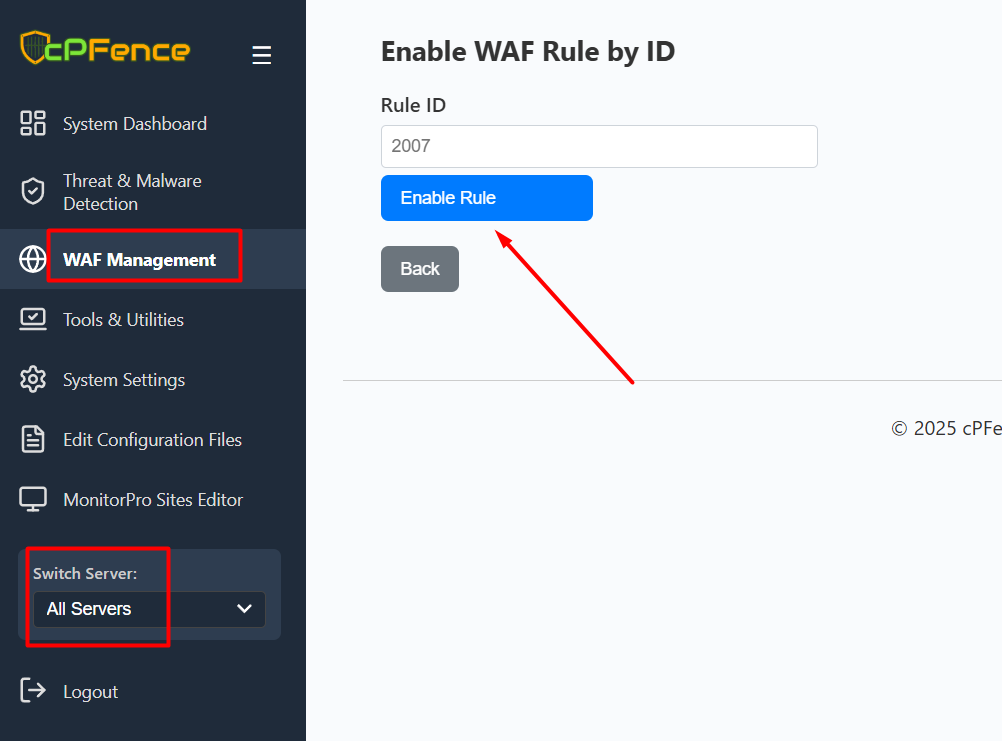

- Go to WAF Management from the left sidebar.
- Under WAF Controls, choose either Enable WAF Rule by ID or Disable WAF Rule by ID.
- Enter the Rule ID and click the corresponding action button (Enable or Disable).
You can also manage domain-specific WAF rules using the other buttons available in the same section.
Using the CLI
Disable a WAF Rule
To disable a specific WAF rule by ID, use the following command:
cpfence --disable-waf-rule RULE-IDReplace RULE-ID with the actual rule number, e.g., 2007.
Enable a WAF Rule
To re-enable a WAF rule by ID, use the command:
cpfence --enable-waf-rule RULE-IDReplace RULE-ID with the rule number you want to restore.
Need Further Assistance?
If you encounter any issues or need additional help, feel free to reach out to our support team via your client portal.
