Backing up and restoring your cPFence settings is now easier than ever with the newly added backup and restore functionality. This ensures a seamless migration across servers or recovery in case of unexpected changes.
WebUI Method
Open the cPFence WebUI on your Main Control Panel server.


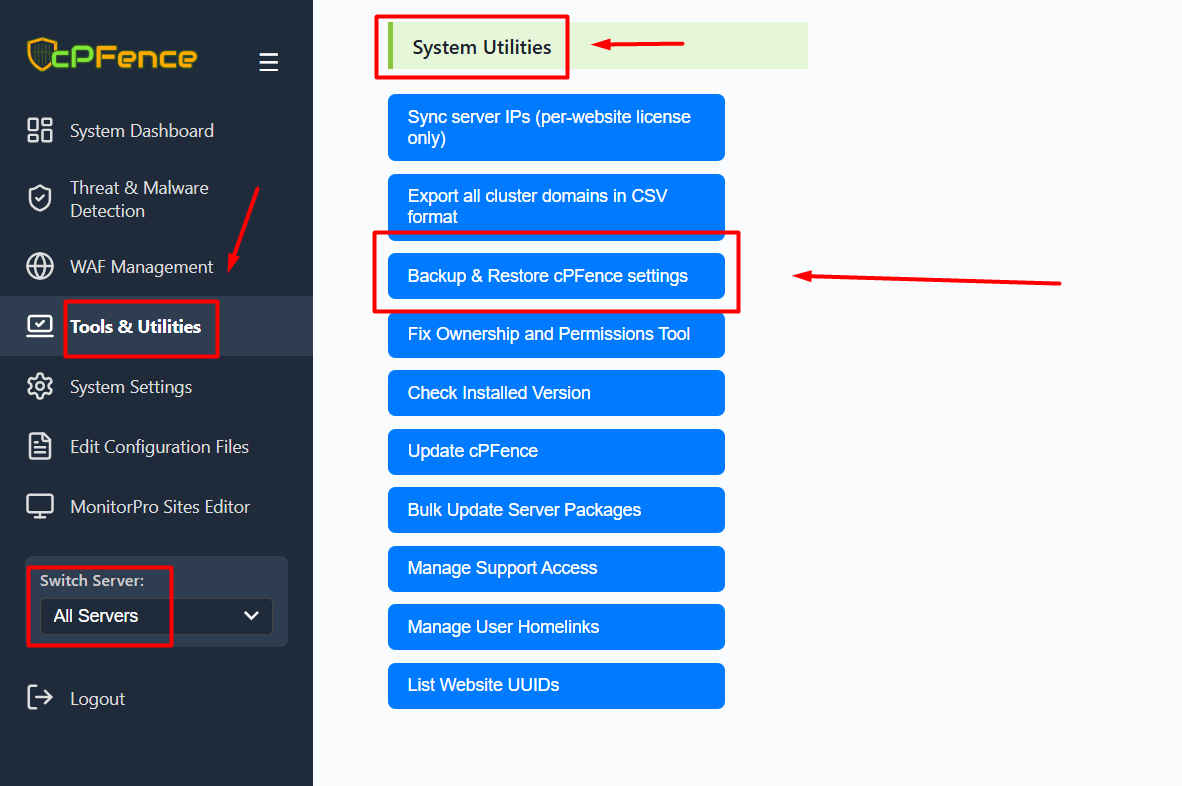
- Navigate to Tools & Utilities from the left menu.
- Scroll down to the System Utilities section.
- Click on Backup & Restore cPFence settings.
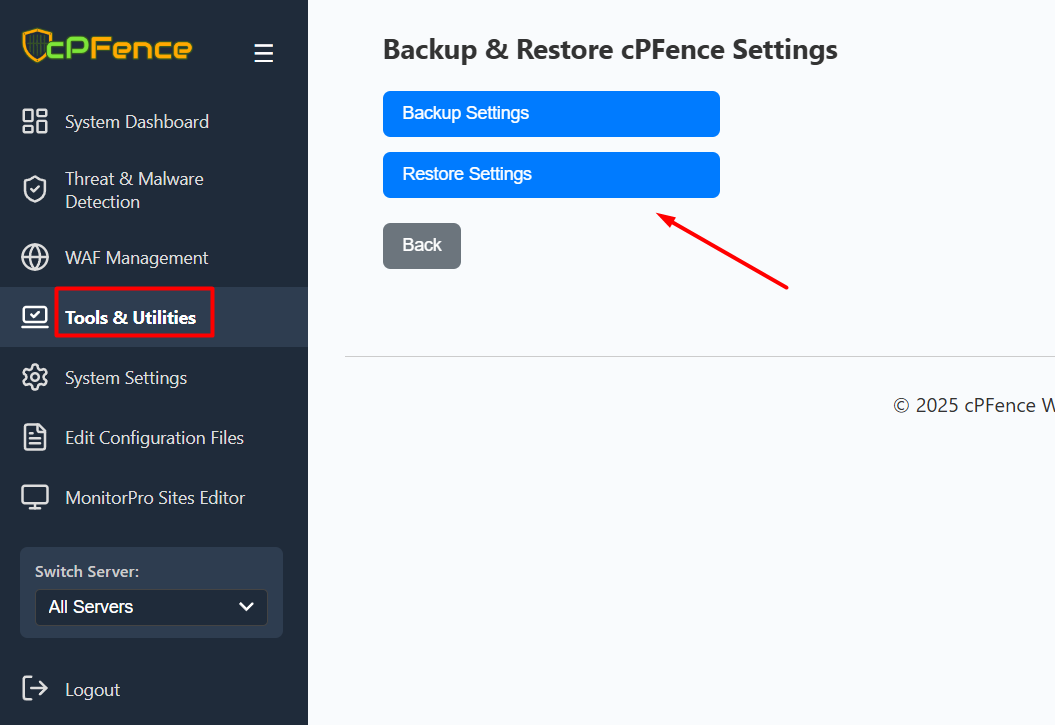
- Choose between Backup Settings or Restore Settings as needed.
CLI Method
Backing Up cPFence Settings
To create a manual backup of your settings, run:
cpfence --backup-cpf-settingsThis creates a file in /var/cpf_backups with the format:
cpfence_backup_YYYYMMDDHHMMSS.tar.gzAutomatic Daily Backups
cPFence automatically performs daily backups and retains the last 30 for safety.
Restoring the Latest Backup
cpfence --restore-cpf-settingsThis will restore the most recent backup in the directory.
Restoring a Specific Backup
cpfence --restore-cpf-settings cpfence_backup_20250603231650.tar.gzMake sure the specified file exists in /var/cpf_backups.
Post-Restore Notes
- Restoration re-applies all previous settings.
- Ensure your license key is valid on the current server. If not, reinstall it using:
/opt/cpfence/app/install cPFence-XXXXXXXXXXXXXXXX- Restart cPFence to apply changes:
cpfence --restartNeed Further Assistance?
If you encounter any issues or need additional help, feel free to reach out to our support team via your client portal.

