cPFence provides various scanning options to detect and manage potential threats. This guide explains how to use the cPFence Virus Scanner effectively.
Using the WebUI
To run scans or exclude files using the browser-based WebUI:
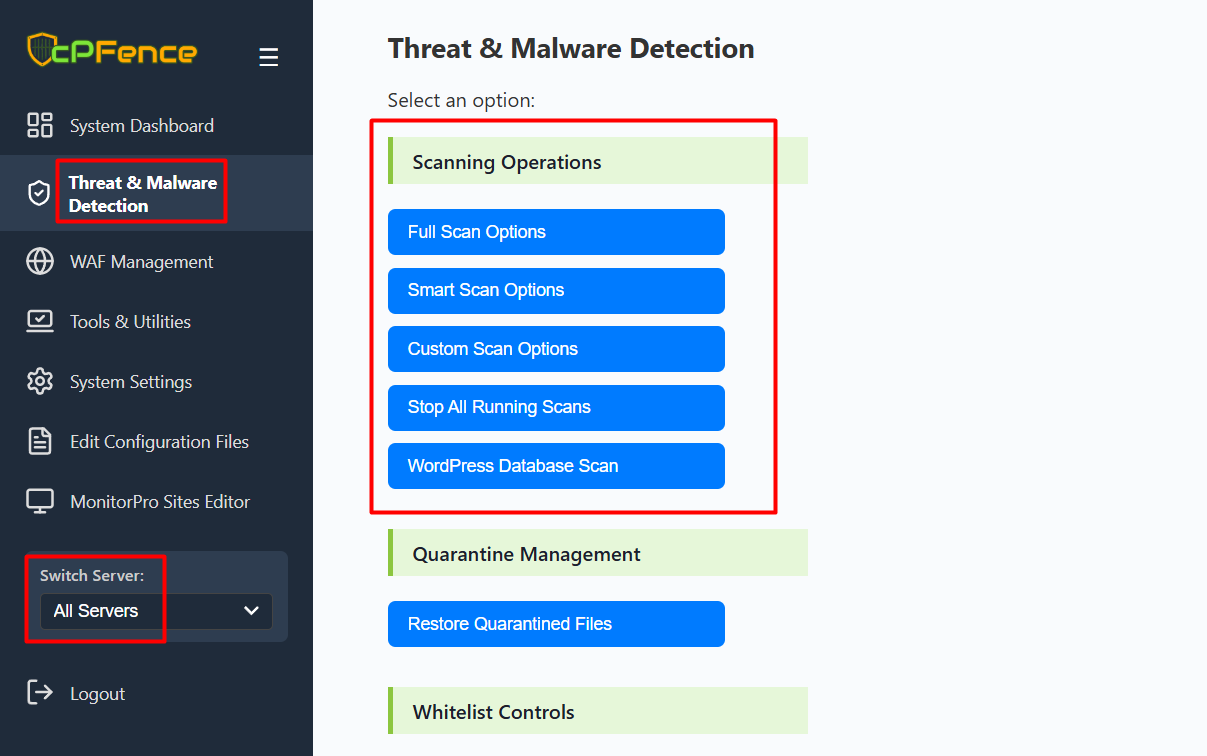
- Go to Threat & Malware Detection in the left sidebar.
- Under Scanning Operations, choose Full Scan, Smart Scan, or Custom Scan and follow the prompts.
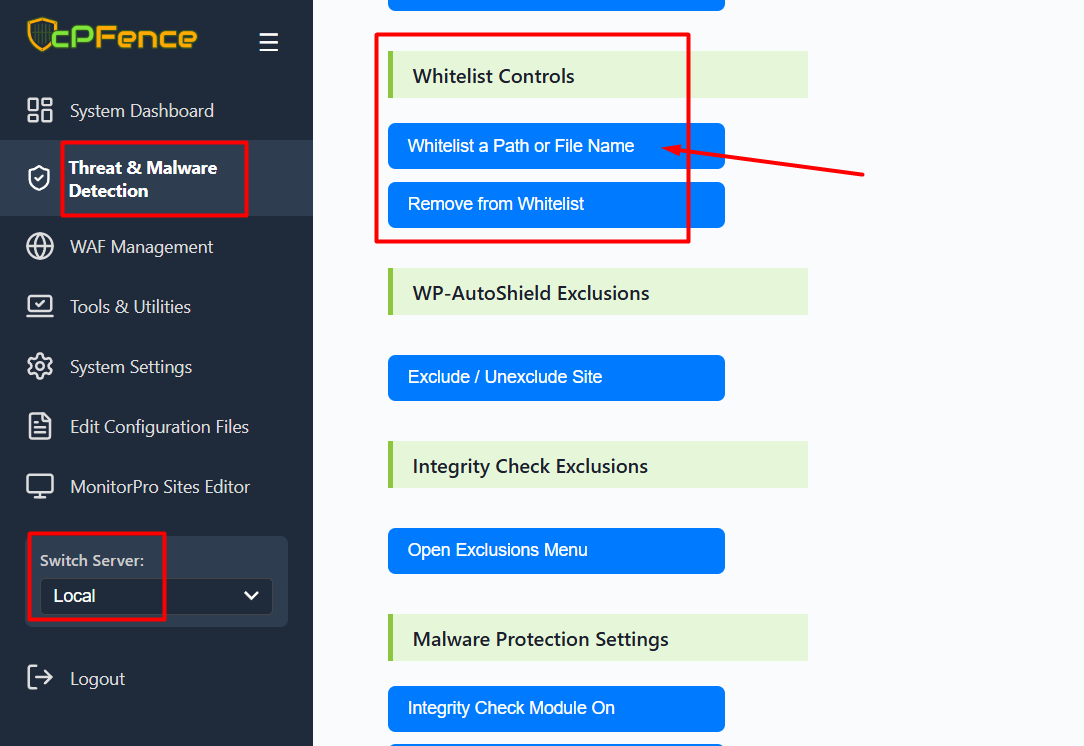
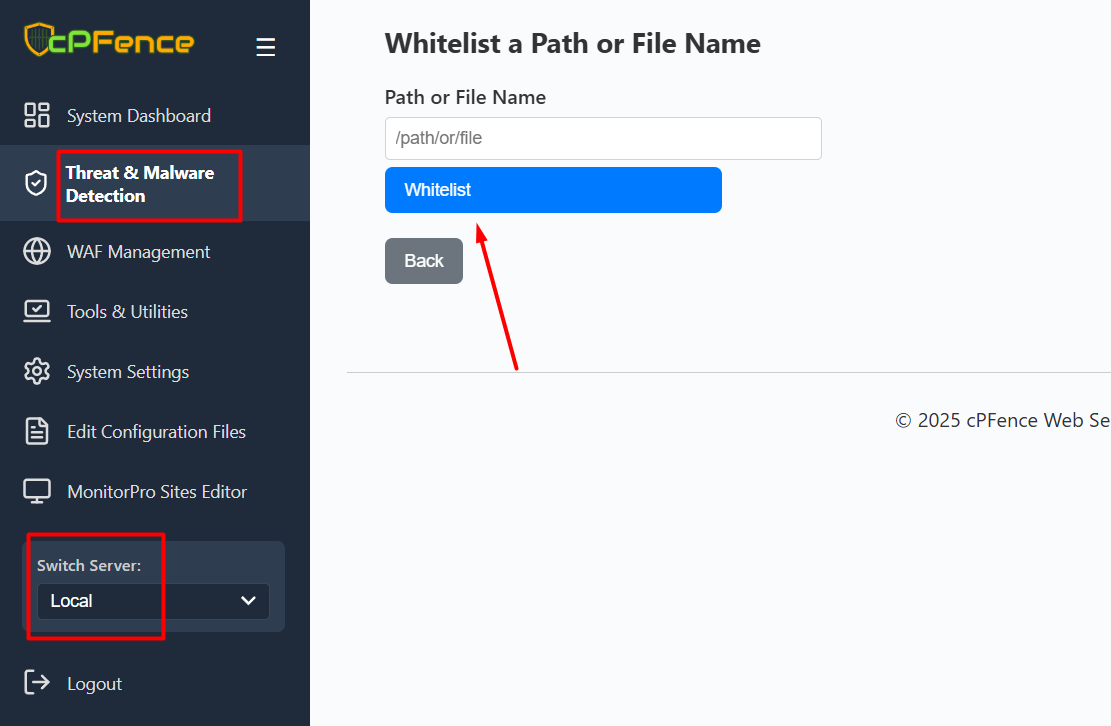
- For excluding files or paths, scroll to Whitelist Controls and click Whitelist a Path or File Name. Enter the path and click Whitelist.
Important:
If you plan to restore a file from quarantine or want to prevent a known safe file from being flagged again, be sure to whitelist it first from the WebUI. Go to Threat & Malware Detection → Whitelist Controls → Whitelist a Path or File Name, then enter the file name or path and click Whitelist.
Using the CLI :
Full Scan
To run a full scan on all files, use the following command:
cpfence --full-scanThis comprehensive scan can take from 30 minutes to several hours, depending on the number of files and system size.
Smart Scan
To run a smart scan focusing on critical areas and commonly infected files, use the following command:
cpfence --smart-scanThis scan is quicker and targets high-risk areas.
Custom Scan
To run a custom scan on a specific path or set of files, use the following command:
cpfence --custom-scan PATHReplace PATH with the desired path or file you want to scan.
Stop Scan
To stop all running scanning jobs (Smart, Full, and Custom), use the following command:
cpfence --stop-scanExclude Path
To whitelist a path or user account from all virus scanning jobs, use the following command:
cpfence --exclude-path PATHReplace PATH with the path or user account you want to exclude.
Delete Excluded Path
To remove a path or user account from the virus scanning exclusions, use the following command:
cpfence --del-exclude-path PATHReplace PATH with the path or user account you want to include in future scans.
Checking Scan Results and Quarantined Files
You can check if any files have been detected and quarantined by reviewing the infection history file. This file contains details about all infected files found during scans.
-
Location of Infection History File:
/var/log/cpfenceav/infections.historyThis file logs all malware or virus detections, including any files that were quarantined during scans.
- Monitoring Scan Progress
When you initiate any antivirus scan—whether it's a smart scan, full scan, or custom path scan—cPFence will provide you with a log file for monitoring the scan's results.
Scan Example Output:
root@server:~# cpfence --smart-scan
Starting a smart scan on commonly infected files only..please wait.
A smart scan job started in the background. Feel free to close the terminal.
This may take 30 minutes up to 2 hours to finish. You can check the log file at:
tail -n 25 -f /var/log/cpfenceav/smart_scan_YYYYMMDD_HHMMSS.log
Need Help?
If you have any questions or need further assistance, please feel free to contact our support team.
